Table of Contents
Crystals (Part I)
Firstly, let’s discuss how to build a Drakania awakening, and lucky enough, it’s a DR class just like Drakania succession; hence just in case you’ve already played the class, you may use the same gear.
In terms of the gearing path, if you’re coming off-season, I would highly recommend that you follow my exact gearing path here, as this guide would provide you with all the info you need about her.
Now, let’s take a brief look at crystals.
Drakania currently has high-accuracy modifiers on her debuffs and self-buffs; however, they are somewhat difficult to learn. Her general accuracy is pretty low, so unlike with the succession build, I would not skip out on the easy-to-gain accuracy.
In my gloves, I usually pick Jin Magic Crystal – Viper; for PvP

I usually go for the Bon Glorious Crystal of Honors – Special Evasion.
As for the helmet, you can run a wide variety of different things here, such as Resistance or Human Damage RPF Crystals, if you need to lean more into a unique type of build.
Crystals (Part II)
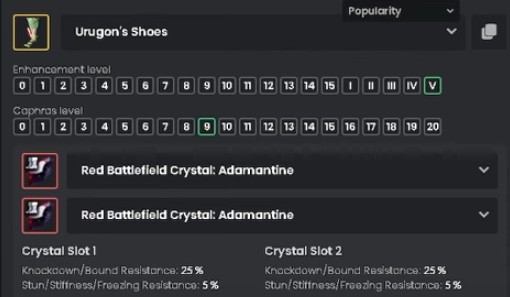
I usually use Red Battlefield Crystal: Adamantine for the boots, as it’s also an ideal choice for PvE. She has a lot of openings in her kit in terms of protection but has some resistance against the most powerful enemy in the game knockdown is a good idea.
Next, we have the weapons where I would usually suggest you use Crystal of Elkarr in main hands, and for PvP, I would advise you to go for Glorious Crystal of Gallantry – Olucas.
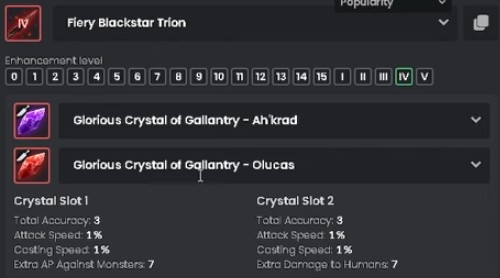
However, for PvE, I suggest you go for Glorious Crystal of Gallantry – Ah ‘krad instead.

As for the offhand for your maneuver, you should use JIN Glorious Crystal of Courage – Ignore Grapple Resistance.
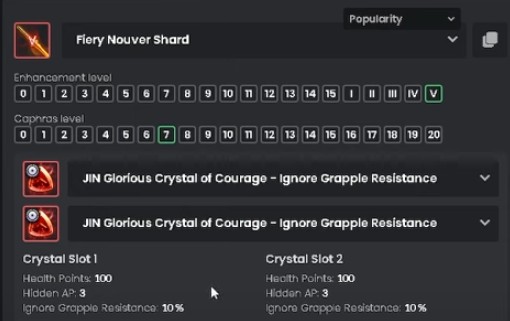
Awakening has a grab, and having the ability to land a grab is extremely helpful. Most people started running JIN Glorious Crystal of Courage – Ignore Grapple Resistance in their kits for PvP.
Running two crystals is a deal breaker regarding landing grabs, so you should go for that when focusing on PvP. In PvE, the only main difference is that you should be running Kutum Dagger or Blackstar Shard offhand and Corrupted Crystals.
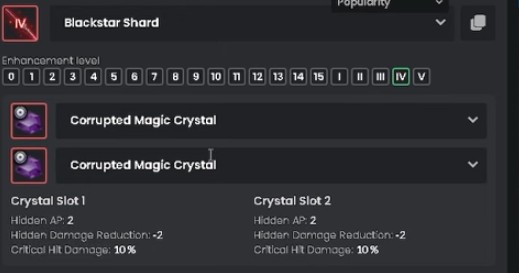
When it comes to the accuracy of the PvE focused, you may choose to run Black Magic Crystals – Valor in gloves and skip out on the accuracy.
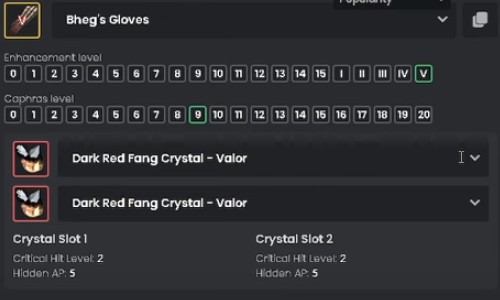
However, I don’t recommend you do that, especially if you do any PvP, as those Jin Magic Crystal – Viper will pay themselves off.
Artifacts
Now let’s take a look at the Artifacts. The PvE setup is quite expensive, however, but it’s incredibly powerful. If you want to make a maximum effort out of Drakania awakening, you will need this artifact setup.
So for PvE purposes, I would always run monster AP on the artifacts, and the Lightstone of Fire: Blade combo for Drakania awakening that you should get your hands on is the Deathblow which gives you a 10% critical chance and +10 damage.
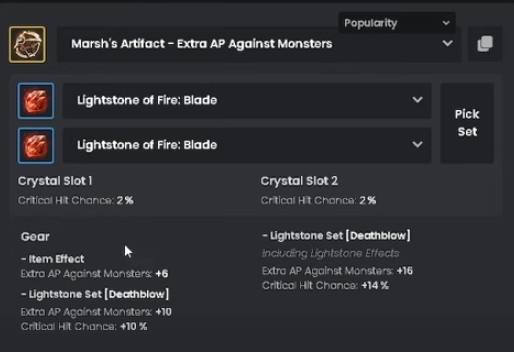
With the actual crystal combined, you should have a total critical chance of 14% and +16 extra AP against monsters.
The problem is that you will need two of these Lightstone of Fire: Blade, which will most likely be going to be sold out as the last time that I checked, these were available at 2.5 billion silver, which will most likely rise to 5 billion silver due to the bids on it.
However, if you managed to somehow get your hands on these two, then you should know that this is by far the best Lightstone combo for PvE Drakania Awakening.
It’s also considered the best combo for any class in the game that doesn’t have a 100% critical rate on abilities. Parts of the kits in Drakania may have a 100% critical chance, but the highest damage one doesn’t, so if you’re able to get your hands on these Lightstone of Fire: Blade, you should get it.
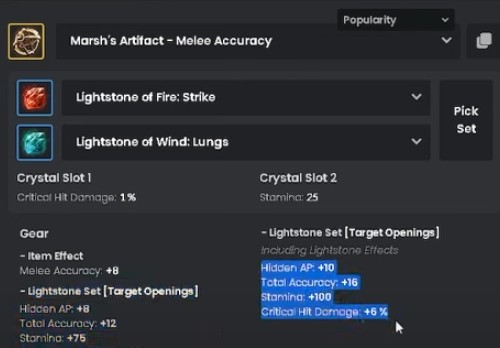
For PvP best in the slot, I suggest you run a Marsh’s Artifact – Melee Accuracy that provides you with +8 Melee Accuracy, and the combo you should be running is Target Openings.
If you cannot get your hands on critical hit diamonds, you might want to run it with a Frenzy one (Lightstone of Fire: Frenzy), which would provide you with +2.5% All Special Attack Extra Damage.
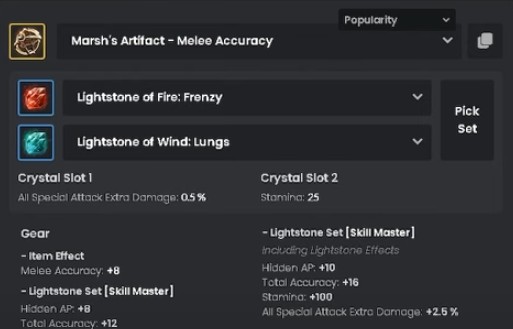
This would provide you with +10 Hidden AP, +16 Total Accuracy, +100 Stamina, and a 6% Critical Hit Damage bonus. It’s a perfect alternative if you’re somehow unable to get your hands on Lightstone of Fire: Strike.
PvE Add-Ons (Part I)
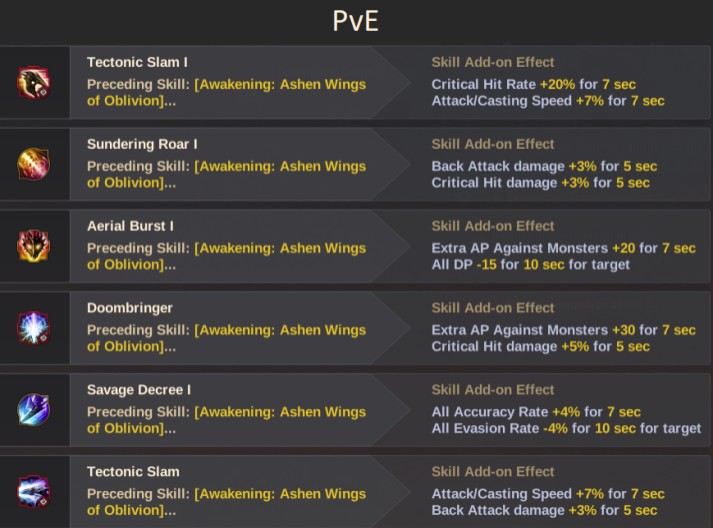
Let’s examine the two major ones, Dommbringer and Sundering Roar I. These two are the Tier 3 add-on that will provide you with the largest possible buff. On both of these add-ons, I’ve added monster damage +30 for 7 seconds and a critical hit rate of 30%.
When I use these two, I will use them at a separate time in my combos, and by having it on both of these abilities, I can keep these two buffs off at pretty much any time.
As always, these add-ons are completely customizable, and you don’t have to follow exactly like the one I will show you in this article, but if you want the best result and are not sure of what you’re doing, then I would highly recommend that you follow these add-ons guide.
The Drakania awakening kit is quite interesting, and if you are not using a critical hit chance. Skill add-ons with +5% Critical Hit Chance and potentially the light stone combo with a 14% critical hit chance, the blue abilities deal more damage to have a 100% critical rate on them.
These two are great mainly due to the extra +30 monster AP, which can be considered the largest buff you can get. At Tier 2, you will only be able to get an extra +20 monster AP, so having an extra +10 monster, AP is always useful in PvE.
The same goes for the Critical Hit Rate, which should be +20 monster AP if you use it on a Tier 2 add-on. Now the 30% Critical Hit Rate is extremely great.
PvE Add-Ons (Part II)
However, if you can get up and get a 100% critical hit rate on your red abilities with skill add-ons etc., they deal way more damage than the blue ones.
Hence, if you intend to go like in-game grinding stuff, you must ensure that you get maximum DPS and the critical hit chance. That will then unlock the power of your red hexplot abilities.
Now, if you’re doing earlier grinding, you probably don’t need this, and you can rely on the critical hit rate of your blue abilities and then change these around if that is what you want to do. Next, we also have Aerial Burst in our add-ons, and you should be using minus DP on this one and an attack speed.
Your combo should usually start with Doombringer to Aerial Burst, so you must get the attack speed right out as soon as possible. Aerial Burst is also a minus DP ability, so why not add more minus DP to that ability?
You should use it for the DPS rate to stack it on top of Aerial Burst. Next, we also have the Sundering Roar I considered the kit’s hardest-hitting ability.
In the blue version, it hits extremely hard, provided you’re able to get your critical hit rates up, so I would usually use it right after getting both of my critical hit rates, attack speed, and damage up. You also need to put some accuracy and buffs on it.
PvE Combo
For a basic PvE combo that you may use to level up your Drakania, you will want to ensure that you’re utilizing your movement abilities, as there will be plenty of pack-to-pack movement. Depending on where you choose to grind, as well as your gear, you might be able to cut off plenty of the abilities or use simple abilities to one-shot packs.

The best abilities will be your huge AOE abilities, such as shift + Q and Shift + F. Some movement tricks you can utilize include the shift + space to fly in and then open up with shift + Q right after.
Shift + Q is one of the best ways to end the flight early, so basically, whenever you want it, you can go straight into shift + Q and initiate a pack that way.
Another great way of going pack-to-pack is W + RMB, W + E, and pretty much every time we go straight into shift + Q, regardless of what we do to get into the pack, use shift + Q right after to start the damage and get those Tier 3 add-ons going. You may also use W + F as it also helps you to go pack to pack.
These abilities are extremely helpful to help you kill huge aoe packs and then move on to the next one. When we get into an area where we need to do a bit longer and more complex combo.
The one I’ve been using and enjoy because it fits perfectly into my PvP combo would be where we move into the pack and start with Shift + Q, followed by Shift + F, S + F, S + S + E, and lastly S + F again.
After that, if the pack is still alive, you can get an infinite loop this combo, and the infinite loop version of this combo would look something like this. We start with Shift + Q, Shift + F, S + F, S + E, S + F, RMB, LMB, Shift + Q, Shift + F, S + F, S + E, and at this point here, your S + F will be on cooldown, so you use RMB, LMB, Shift + Q, and then rotate it from the start.
PvP Add-Ons
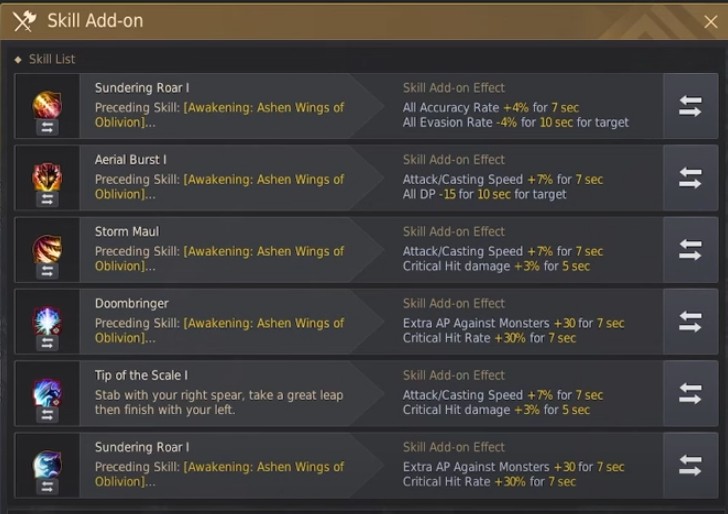
For the first one, we usually recommend players go for Sundering Roar I. We currently inconsistently always make the same combo, so we are trying to add a critical hit rate wherever possible.
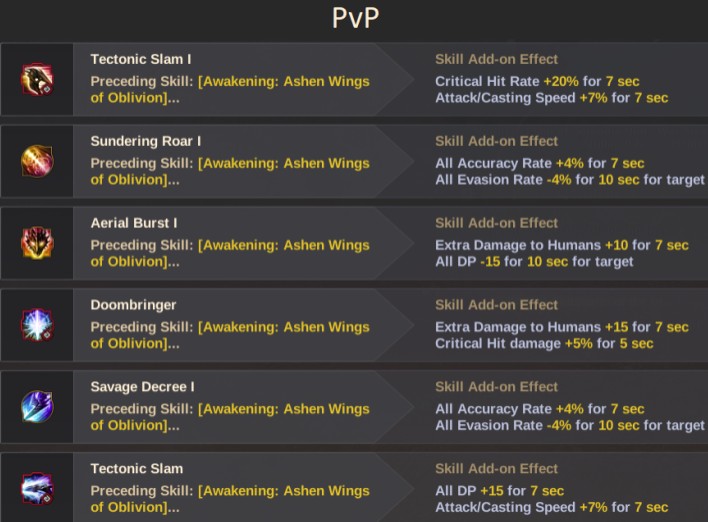
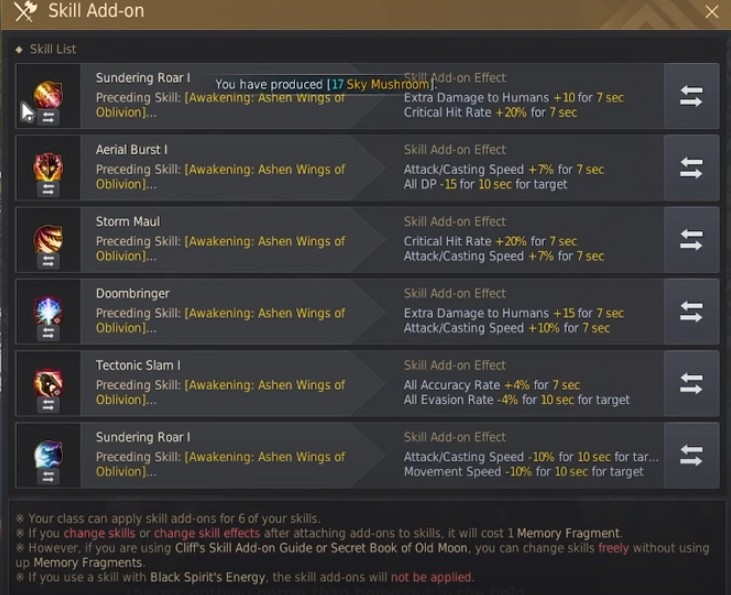
Sundering Roar I is such a hard-hitting ability, so getting that critical hit rate on that ability would help you to ensure that you will have at least two and more critical hits when you’re using it for that high-damage combo.
On top of that, the extra +10 human damage is always a great addition. Specifically for PvP purposes, Aerial Burst I is an incredibly good catch, and as we covered earlier, the ore add-on for this makes it a cc, so it’s like a decent aoe cc as well can expect to use it all the time. It also provides an additional cast speed of +7%, so you will have a good chance of landing it, which means procking the attack speed.
Next, it also gives you All DP -15 for 10 seconds for a single target which is pretty useful for beginners. We will also need Storm Maul, which is the movement speed ability.
It’s great for getting into position doing catches or anything similar. It provides you with a +20% critical hit rate and a bonus +7% attack speed for 7 seconds. You will need to use this ability quite often as it’s a protected ability that deals great damage.
You should always keep those abilities up in PvP to allow you to get more damage so that you can land the compost when we catch people with Drakania. After that, you will also need Doombringer, where you will need to put on max human damage, cast, and attack speed. You must max out these stats, as you can do plenty of damage with Drakania awakening.
PvP Combo
As for the PvP combo, you need to use the Core Aerial Burst; otherwise, it won’t work. The first combo will be coming off a catch which means that we don’t start with the grab so that we would still have the grab just in case you need it.
You can always use a grab cc and then go for a combo. One of the things that I love about this combo is that it utilizes movement abilities so that you can get the range catch cc. Besides that, if you’re too lazy and prefer to have the core of your damage abilities be the same as for PvE and PvP, this might be just the combo for you.
For this combo to work, you may do it either by using W + E, or W + RMB. Many would prefer W + RMB because it has an iframe to it, while W + E does the same thing, which is a movement ability with cc at the end of it; however, it’s unprotected as we don’t have the call for it since we need the other call for this combo to work.
PvP Combo (Repositioning)
You may also use them to reposition by starting with a cc. Use W + RMB into the floating cc; after that, you need to go straight into shift + Q. By using shift + Q instantly, we can cut off some of the unprotected frames after the iframe runs out.
If you notice during your gameplay that there is an iframe right after you use W + RMB, there’s an unprotected section. By going straight into shift + Q, even if we hit the cc or not, we could limit the chance of getting cc’d ourselves.
That’s basically how you need to get it done. You need to see if you can get that catch and always go shift + Q right after because even if you miss it, at least you’re protecting yourself, and then you can disengage and try again.
Remember, right after shift + Q, always go for shift + F for the stiffen for the knockdown and then proceed with S + F, S + E, and S + F. You may need then iframe away to get out from the spot safely.