Heir of Light
Table of Contents
Introduction:
Hey everyone, I’m Asian, a day 1 player from global release. As of right now I am fairly high in the overall leaderboards, ranking usually around top 50-100 in most categories, barring PvP where I do not really play as much due to a lack of a good team. I am mostly F2P (spent only $20 USD so far) and have worked my way up to where I am, so I won’t be talking about the game from a whale’s point of view, rest assured. If you want to ask me any questions about the game send me a message in discord, @AsianLife #9601 or you can PM me in global server with the IGN: Asian. Hopefully you find this guide useful!
By: Asian – Global Server
Beginner’s Guide
Discord:
For general purposes, staying notified on the game, getting advice from top players, and to communicate directly with the developers. If you have further questions that are not listed in the guide, feel free to ask them in general chat.
Campaign/PvE:
As you progress through the map, things will get harder at a relatively quick pace. Notice how there are certain special tiles such as Omen’s/Heide’s Void, Awakening Dungeons, Invasions, and Big EXP Tiles. Something worth mentioning is story PvE is an absolute joke as of this moment for Water, Forest, and Fire tiles, you should be able to clear those completely easily with a 6 star team. The light and dark tiles are much harder and may require a lot more progress for you to clear them completely.
PVE Invasions:
Not really anything exciting here, it is basically a randomized PvE experience but instead of getting shards, low-tier gears, and rare summon stones, you get honor points and karats. I believe these scale with your level and get harder as you progress more. However, most of the time these should not be a challenge to you.
Events:
Double Event:
Sometimes there will be a double everything event, which basically gives you double daily valor, hourly gold and exp boosts. This is a great time to either farm gears during gold rush or farm levels when exp boost is active.
Monthly Events:
There are monthly events that occur that usually reward either a specific Nat5 character or a bunch of summon stones or karats. These events are super easy to do as they only require around 20-30 minutes of daily gameplay (most of it in Auto mode). You should definitely finish the event in its entirety before it ends. You should remember to check and claim all rewards, as I have missed Nat5 rewards by one day because of me simply forgetting to claim the event dailies.
Mass Invasions:
Occasionally (Once a month-ish) there will be a mass invasion event for a random Nat4 servant. Try and clear as many of the stages as possible (they are easy if you are progressed further into the game) for a maximum of 3 Nat4’s summoned, with around 20 shards left over for the 4th one. An even rarer variety of mass invasion would be a light/dark Nat4 servant. It is much harder to clear all of the stages, but still easy enough for a mid to late game player. These stages will net only 1 light/dark Nat4 from shards.
Community Events:
Fun, short events hosted by CM_Heylel to keep the community alive during the grindfest. These are quick 1-tap events that you should always participate in.
Discord Events:
Much more time-consuming, these events are oriented around community long-term growth and retention. They require you to submit a certain digital artifact (art, video, etc.) into discord and all participants get a prize. Top submissions get the best rewards. If you have a passion for creativity or want to support the game without paying, this is the event for you.
Dungeons:
There are two main types of dungeons, gear dungeons and awakening dungeons. Gear dungeons allow you to get high level gears that you would not otherwise find in normal tiles consistently. Awakening dungeons give you awakening stones to awaken your servants. Omen’s Void and Heide’s Void are both gear dungeons, however you should focus on Omen more than Heide for early-game. If you want help on clearing dungeons, see Dungeon Guides.
Rerolling Tips:
A popular option among newcomer heirs, rerolling is the method of creating new accounts and summoning using the given stones to get the desired top-tier servant.
What to reroll for:
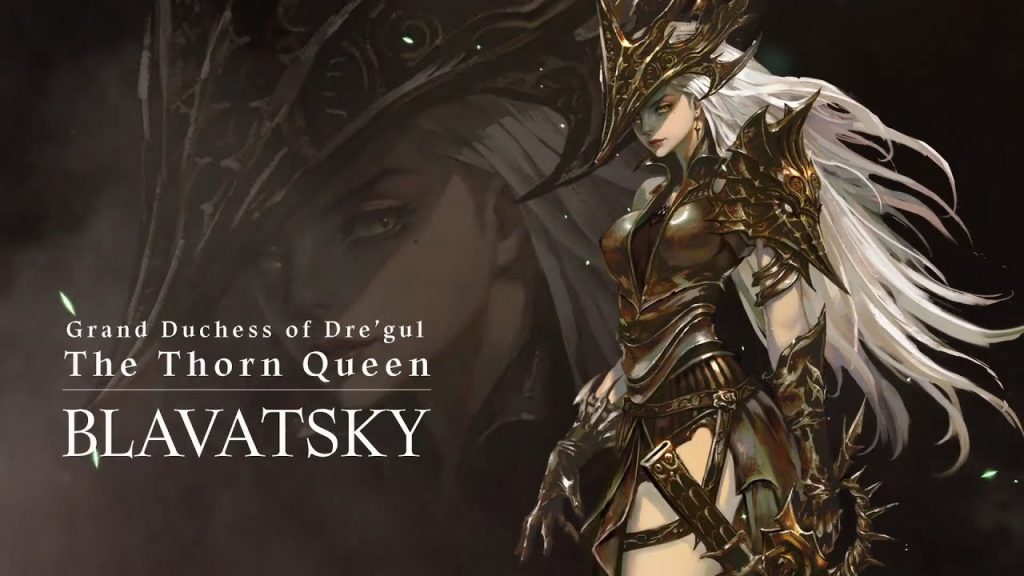
- Water Leto/Fire Blavatsky – Considered to be the two best DoT’ers for Omen’s Void F10. Once you build and skill up these servants, they will be extremely useful in farming high level gears. Getting any of these two will boost you 2-3 weeks ahead in progression.
- Fire Spiegel/Water [A] Sphinx/Forest Ignis – These three are skill-gauge booster supports. Basically when awakened, they will boost the skill-gauge (reduce cooldown) of your DPS’s combo skill every time your tank is hit. This adds up to be a large spd-boost, and will make your DPS deal more damage.
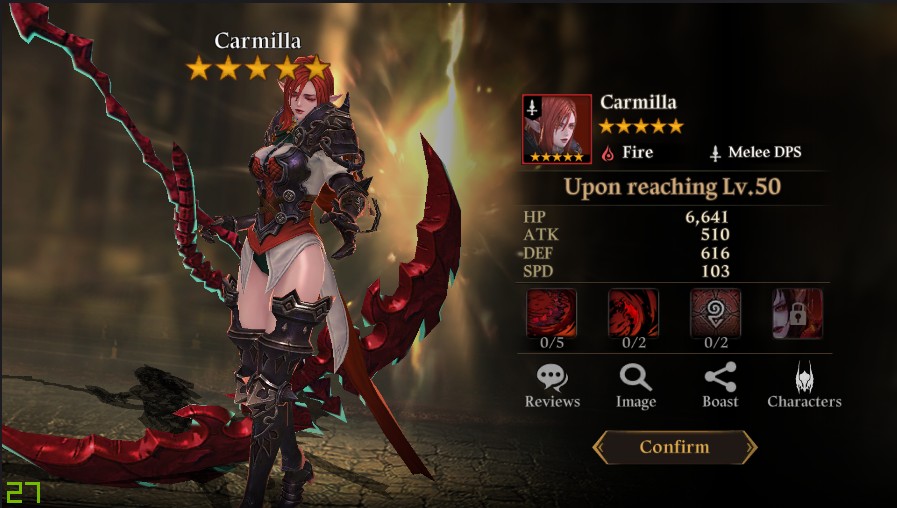
- Fire Heide/Forest Rem/Water Carmilla – Considered to be the best tanks in the game for both PVE and PvP. Their passive allows you to use them as a def-based tank in all floors of Omen’s Void (even F11). In addition, they hard counter any single-hit defense-ignore DPS servants such as a default avatar Xita, Charlotte, and Water Heide.
- Any Ignore Def DPS – Ignore Def DPS servants are by far the useful type of DPS servant in the game. In almost every aspect of the game, they will dominate. Having a skilled-up and transcended ignore def DPS will boost you up the leaderboards easily.
- Water Lenore/Water Blavatsky – Currently the two most dominant servants in the game in PvP. Lenore pairs extremely well with the dark tank Ishmael due to his link, and both pair up with Ankou. With newly added buffs on Attack-based DPS servants, they are completely viable and can deal massive damage. Speed-based DPS such as Blavatsky are always a solid option as well.
- Any other servant – Ask around in discord, or check the tier list in discord!
If you don’t want to spend time rerolling, you can still easily gather a team of Nat5 servants as long as you grind and stay faithful to the game long enough. I personally have gotten almost 30 Nat5’s from summoning and various events that have been ongoing since global release a couple of months ago.
Currency Management:
Gold:
As a beginner, you may feel like you are running out of gold constantly. This is quickly alleviated once you begin to get a feel for the game and have farmed for gears and levels. Gold is surprisingly common, and can stack up very quickly. As a result you do not have to be super stingy on which gears you enhance. However, keep in mind that the Auto enhance to x-level definitely drains your gold at a fast pace, so be wary of your gold usage. In addition, do not enhance any gears that are below rare quality and gears that have flat substats. More details can be found in the Gear Guides. With the addition of potential ability, gold is getting increasingly harder to keep up with. It is recommended to farm Omen’s Void if you want gold.
With the addition of potential abilities, gold has become more and more scarce for late-game players. When progressing, please keep in mind your gold usage, and hoard as much as possible in the early-mid game stages to prepare for the drain that will happen when you reach late-game.
Karats:
Being the premium currency of the game, utilizing karats in an efficient way is key. If you are running low on valor, you can freely use karats to get more. I would not recommend using karats to buy PvP tokens unless you are aiming to be high on the leaderboards. When farming servants up to 6 stars, make sure to keep an EXP booster on at all times. The EXP boosters in the shop are very valuable and are a great use of your karats. If you have an excess of karats, you could rate+ summons. They have recently been buffed and are much more worth it than normal epic summons. Finally, if you have an excess of karats, you could also buy Nat5 servant shards in the shop. It is fairly expensive, but getting 250 shards of a desired servant is valuable in the long run.
Honor Points:
There are only two things that you should consider when using honor points. The first and main focus would be the three weekly Skill Buns that you can get with 450 honor points. Skill Buns are extremely rare outside of the honor point shop, which is why you should spend as many honor points on them as possible. If you manage to get more than 450 honor points per week, you can upgrade your tower invasion defenses, which will help bolster your rankings on the leaderboard.
Guild Points:
Your primary focus for guild points should be Bastille Shards. Bastille is a great servant to have and using guild points to get him is the only way to do so. Until you have all three types of Bastille completely transcended, I would recommend continuing to use your guild points on his shards. If for some reason you do not want any more Bastille’s, you could spend points on the instant 6*, which will save you time or any other of the shop options, with the exception of the summon stones, which are a waste of points in my opinion.
Evolving/Leveling:
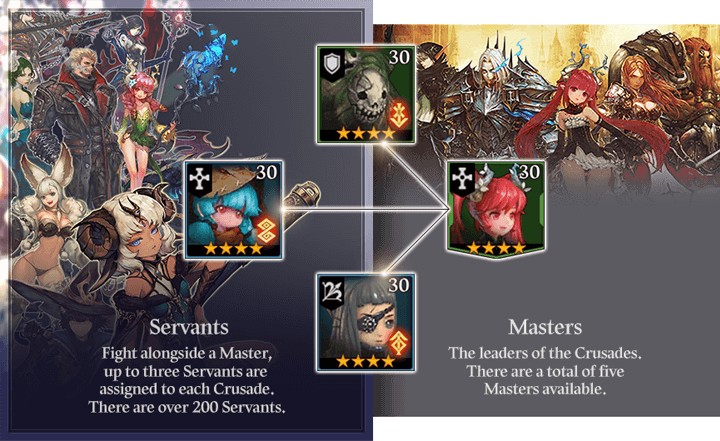
Basics:
Just like any other gacha game, you are capable of bringing any servant up to 6-star level by evolving them. This is typically done by leveling the servant up to max and using X amount of fodders of X-stars to evolve the servant to the next star level. To evolve a 4-star to a 5-star, you need four 4-star fodders to evolve. However, with the introduction of fusing, this normal system of evolving fodders is useless. Fusing is a much better way to gather materials.
EXP Tiles:
In this game, the best stages to farm exp at is in any of the large tiles that have a sign on them saying “EXP”. It is recommended you use one high level farmer that can easily beat the exp stage while the other three slots are for leveling. Keep in mind that if your fodder servants die in battle, they still gain EXP.
Fusing:
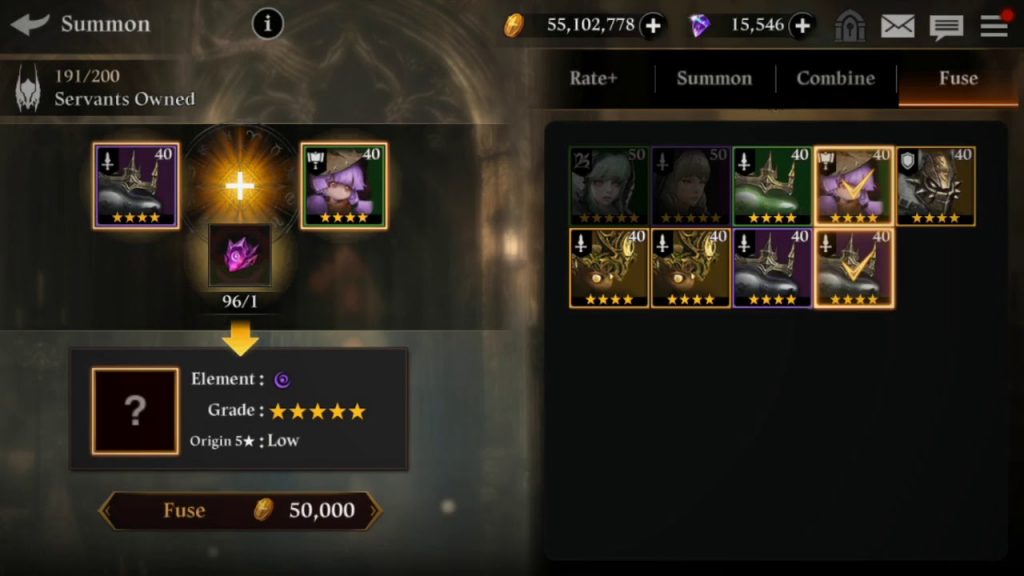
By far one of the best features of this game is fusing. This allows you to “combine” two servants at max level(Nat3 and above) to get a random servant at a +1 star count. For example if you fuse two 3-star servants together, you will get a random 4-star servant. This is incredibly useful because you can easily get 6-star servants with minimal fodder needed. Previously, it would take around 100-ish 3-star servants to grind up to a 6-star. However with the introduction of fuse, it only takes around 20 3-star servants to grind up to a 6-star.
Combining:
This is a pretty unique mechanic that I haven’t seen in any other game. It basically allows you to get specific fodder servants, typically 3 Nat4s and 1 L/D Nat3 to combine into a specific Nat5. In the beginning of the game, I do not recommend you to combine, since getting your main servants awakened and leveled up is much more important. However, once you have gotten a good grip on the game, you should always try to combine whatever Nat5 is available in the combine list that month. This is essentially a free specific Nat5 that you can use to transcend an existing one that you have or to simply collect them or fuse them into another Nat5. Water Heylel is a servant that is permanently part of combine (due to storyline). Every month you can combine for her once, which can net you a max level Water Heylel in around 6 months, if you don’t summon her anywhere else. She is definitely worth getting due to her extremely powerful support abilities as well as AOE silence.
Game Mechanics Guide
Marks/Combo System:
A question that many players ask is how does the Combo System work? As you can tell already, every servant as a different mark as their combo skill mark/primary mark. This is the mark that will be used up whenever you proc a combo skill. Any other servants with that same mark in the same team will lose a bit of their own marked combo skill, but it is not a complete reset.
To combo into other combo skills, you must take a look at a servant’s secondary mark, which is located in the Skills tab. This secondary mark shows the mark that will be combo’d into after you proc the primary mark. For example, if I have three servants:
1st servant has mark X and secondary mark Y
2nd servant has mark Y and secondary mark Z
3rd servant has mark Z and secondary mark X
If I proc the 1st servant’s mark, then there is a chance that the 2nd servant’s combo skill will also activate afterwards. This is because the primary mark of the 2nd servant matches the secondary mark of the 1st. Once I proc the 2nd servant’s mark, then there is a chance the 3rd servant will proc as well. You cannot loop back around once you have gone through all of the servants.
Another thing to note is Support servants have a base 50% chance to activate secondary mark (combo) and all other servants have a base 20% chance.
Buffs and Debuffs:
Blue = Buff
Red = Debuff
Defense Up/Down:
Increases defense or decreases defense by 14% per stack (Max 70%)
Attack Up/Down:
Increases attack or decreases attack by 10% per stack (Max 50%)
Critical Rate Up:
Increases CR by 6% per stack (Max 30%)
Speed Up/Down:
Increases speed or decreases speed by 6% per stack (Max 30%)
Heal over Time (HoT):
Heals HP by 7.5% per stack (Max 37.5%). This is total amount healed, not per tick.
Glancing Hit Up (Buff):
Increases enemy’s glancing hit rate by 5% per stack (Max 25%). If applied on your servant, then your servant will live longer because the enemy hits for not-very-effective damage more often.
Glancing Hit Up (Debuff):
Increases chance of glancing hit by 5% per stack (Max 25%). If applied on your servant, then the enemy will live longer because you hit for not-very-effective damage more often.
Damage Taken Increase:
Increases damage taken by 5% per stack (Max 25%)
Immunity/Buff Block:
Immune to all debuffs or immune to all buffs
Damage over Time (DoT):
Deals damage by 2% per stack (Max 10%). This is damage done in total, not per tick. Elemental DoTs that are resisted will deal 0 damage.
Taunt:
Switches aggro to caster. This may not work if there is an element advantage between enemy and tank and an element disadvantage between enemy and non-tank servant.
Fear:
Servants will run away from enemy, restricting skill use
Shield (Bubble):
Gives a temporary health shield that will negate all damage until shield is broken or is timed out
Leech (Vampyre):
Heals HP by 5% of damage dealt. With a vampyre gear set, you can achieve a higher HP to damage ratio.
Resilience:
Prevents HP from dropping below 1 (invulnerability)
Stun:
Prevents all skill and auto attack use
Heal Block:
Prevents healing
Silence:
Prevents all skill use
Freeze:
Prevents all skill and auto attack use, forces relocation
Petrify:
Prevents all skill and auto attack use, stops skill recharge
Skill Accuracy:
To determine a skill’s accuracy (rate at which it applies debuff on enemy), there are several factors. The first factor is the cast rate of the skill. For example for most servants, the rate at which a debuff is cast is 70%. Once you skill up this skill to the maximum, you will have a 100% cast rate. The second factor is the accuracy of your servant and the resistance of your enemy,. The accuracy formula is Cast Rate % * (100 – (Resistance – Accuracy)). If Resistance – Accuracy is negative, then it defaults to 0%.
Keep in mind that the cap is 85% apply rate and 15% resistance.
To determine a skill’s true accuracy, you must multiply the two factors together. With the best possible cast rate and accuracy to resistance combo, you can achieve an 85% chance of hitting your debuff at all times.
Because there are two factors, involved, not just one, skilling up DoT servants is especially important as without skill-ups they can only achieve a maximum 59.5% chance of applying the DoT. In general, accuracy is surprisingly not as important as you would think, rather the cast rate is much more important.
Skill Cancelling:
A neat little trick that can save your servants’ life is skill cancelling. This allows you to cancel any skill in PvE, Tower Invasion, Abaddon, and World Raid, with the exception of cancelling a support statue’s catastrophe skill and the World Boss’s countdown skill. In order to skill cancel, you need to proc your servant’s combo skill immediately after the enemy procs any skill. The animation from your combo skill effectively negates the skill used by the enemy, thus you take no damage and no debuffs (with the exception of the freeze and petrify skills of a support statue). Utilizing this skill cancel method, you could bypass many dangerous skills such as end-game PvE’s Dark Leto combo skill or Omen’s Faltering Calamity skill.
The most useful part about this skill would be for early to mid-game players cancelling higher level Omen Calamity skills. To do this properly, you must proc a normal skill right after Omen procs a skill at countdown 1. This will keep you in rotation to proc your combo skill right after Omen procs his Calamity skill at countdown 0.
Aggro/Taunting:
There are several ways that aggro works in this game. The first way is usually from element advantage. At the beginning of every battle, your servant or the enemy will always target the servant that has the weaker element, or the element that it is super-effective against. If there is a tank of the same weaker element, there is priority in aggro towards the tank. Occasionally, tanks will also begin to tank aggro even if they resist the element and the DPS/support servants are of the weaker element, but aggro is easily changed if the tank is relocated through portals/shoves or prevented from moving.
Things get a bit dicey with a support statue’s ability to shove servants away, teleport servants to different places, and bind servants to a certain area. Usually, in a similar element team (all fire servants), after a shove or bind, the enemy will aggro towards the ranged DPS servant. If there is a primarily melee DPS team, then after a shove/bind, aggro will go towards a melee DPS servant. In a team with mixed servants, shoving, binding, and teleporting will cause aggro to be towards servants of the weaker element, especially if the tank is of the weaker element.
Taunting is nearly perfect, however there are still some niche situations where they do not work properly. Against an enemy who primarily prioritizes the weaker element DPS at the start of the level (orange eye is above the DPS servant in selection screen), taunting with a neutral element or a resisted element will not work, and the enemy will keep attacking the DPS servant. It will work if the tank is of the weaker element as well. In other cases, such as multiple tanks in one team, taunts are first sorted by elements. Taunts from a weaker element tank will prioritize over taunts from a neutral and resisted element tanks. Then they are sorted by chronological order. Taunts that were cast the latest (newest) will be prioritized over taunts that were cast longer beforehand.
Autoing:
There are three types of Auto Modes.
The first one is when the Auto button is not blinking at all. This means that your servants will only use auto attacks.
The second one is when the Auto button is blinking in the three squares only. This means that your servants will only use primary and secondary skills, along with auto attacks.
The third one is when the Auto button is blinking in the three squares and the outside border. This means that your servants will use all three skills, along with auto attacks.
In the third auto modes there is a priority scale for certain skills. The highest priority skill is the heal skill from a healer (not a HoT skill from any support servant). Once a servant drops below 50% HP, if a heal skill is able to be used, it will always be used. The next priority skill would be the combo skill. If a combo skill is ready to use, it will be proc’d (with exception of a servant in need of healing). If there is no healing required, and no combo skills to proc, and a DPS servant is being targeted as opposed to the tank, then the tank will proc their taunt skill. Every other skill seems to be fairly random. This applies to the second auto mode as well, with exception of combo skills.
Fusing:
As I mentioned in the leveling guide, fusing is an extremely useful tool to grind 6-star servants in little to no time and resources. However, another usage of fusion is to possibly get higher tiered natural servants. As you fuse two servants together, if the grade of the servants is high, you have a high chance of getting a grade of similar or higher value. For example, fusing two Nat3s will likely give you a 4-star Nat3. However, sometimes it may give you a Nat4. Likewise, if you fuse two Nat4s, you will likely get a 5-star Nat4, with a low chance of a Nat5. Combining two Nat5s is a guaranteed chance to get a Nat5. This can be useful if you want to “reroll” a Nat5 at the cost of a Nat5. The order in which you fuse is also important, as the final product will have the same element as the first in the fusing process.
Fusing is better than evolving servants unless you want to specifically evolve a servant without changing it. It uses less materials, as well as gives you a chance of a Nat grade up.
Potential Ability:
This portion of the game should only be messed with when you are mid-late to late game. Things are VERY expensive gold-wise when it comes to potential ability.
When you clear world battle, you get these potential stones as well as potential change stones. These are used to upgrade a servant’s potential, or change them. In order to even unlock potentials, you need rainbow supreme stones, which cost 1 of each elemental supreme stone (with exception of magic) to create. As you can probably tell, this is quite expensive on supremes. In addition, it costs a hefty amount of gold to unlock potentials, ranging from 100k to 4m gold. To upgrade a servant potential, you will need potential stones (these drop fairly plentifully you should never run out of these unless you have unlimited gold). Again, each upgrade costs quite a lot of gold, from 10k to 500k. To change these potentials to something you desire, you need to use potential change stones, which are currently quite hard to acquire consistently. More gold is needed to change potentials.
For Nat4 servants, only the 1st row of potentials is unlocked. This row is undoubtedly less effective than the 2nd row, however it still gives a huge buff to any servant. For Nat5s, both rows are unlocked, giving them an advantage over Nat4s. In addition, the later 2nd row potentials have a ranking system from C to S, depending on which rank you get the more effective the potential will be.
As of right now, the potentials will not show on servant statistics, however they do in fact apply once you get into battle.
For choosing certain potentials over others, just try to make your best judgement based on the potentials description. If you are upgrade tank potentials, try to look for things like ignore def resistance or crit resistance. If you are upgrading potentials for DPS, look for increased damage and other offensive capabilities. For healers and supports any team oriented potentials usually work best.
Gearing Guide
Gearing Overview:
Gears are absolutely essential to building your servants properly, without them the servants are borderline useless even when leveled to the max. It is important to know what to look for in a gear because having the wrong substats, primary stats, or even sets could mean you are losing a lot of usability from that servant.
There are 8 total gear slots for each servant, with the 7th and 8th slot being unlocked when you achieve 3rd and 5th awakening, respectively. Only Nat4 and 5 servants can unlock 7th and 8th slots. For all general purposes, slots will be sorted in this fashion:
Slot 1 = Weapon
Slot 2 = Gloves
Slot 3 = Shirt
Slot 4 = Helmet
Slot 5 = Pants
Slot 6 = Shoes
Slot 7 = Necklace
Slot 8 = Ring
For Gear Sets, you can achieve the bonus by equipping the proper amount of gears of that type on the same servant.
Beast = 4 set
Life = 2 set
Blade = 2 set
Skill = 2 set
Vampyre = 4 set
Chain = 2 set
Iron = 2 set
Eruption = 4 set
Havoc = 4 set
Resistance = 2 set
Petrify = 2 set
Wind = 4 set
Sometimes you may not have enough gear or you are missing a proper gear of the set. It is completely viable to use another gear with the desired substats that you need but doesn’t complete the set. For example if you have a tank that requires a Life set, but you have no life pants with Def% or HP% substats. You can find a Vampyre gear with Def% or HP% substats and equip it instead. You will lose the 15% HP, however the substats that you gain may be worth more than 15% HP.
Gear types are useful in different ways. Beast, Havoc, Blade, Life, Skill, Resistance and Iron gears are fairly self-explanatory so I will skip them.
Vampyre gears, when equipped as a 4 set will give a Life-steal effect on the servant. The amount of damage the servant heals itself is 35% (or 38% with linked set) of the damage that the servant deals. This is viable on certain self HP-based servants such as Fire and Forest [A] Leto, who boost their offensive stats when near Full HP. Also, this is viable for EXP farming (When Bjorn was a master, many would vamp him for farming purposes), where you can use a single level 60 servant to kill a boss to gain EXP for the rest of the servants. Because they are vamped, this servant can survive all of the damage the boss deals. Vamp gears could also be viable for tanks that have skills that deal a fair amount of damage such as Fire Heide and his Damage based on Enemy’s Max HP combo skill and the light/dark Nat5 tanks that have a hybrid attack increase passive such as Light Heide. In general however, vampyre gears on tanks are not the best idea unless they naturally have a higher attack stat or you have exceptional substats.
Chain gears are not used that often, but they can be used to achieve a combo skill based team. A 2 Chain set boosts a servant’s chance of activating a secondary mark on combo skill use by 15%. Many players tend to put chain gears on support servants, as they have a base 50% chance to combo into their secondary mark. The viability of chain has been increased significantly with the recent buff to chain gears in the 2.3 update. For many players, adding a single set of chain on supports is now extremely viable. Keep in mind that there is a max cap on combo now, at 85%. In addition non-support servants have a base combo rate of 20%.
Eruption gears are one of the most popular types of gears that players use. A 4 set allows your servant to increase their speed by 25%, which is arguably the biggest stat change of all the other sets. Higher speed allows you to have smaller cooldowns (not global cooldown) for each skill, thus making eruption gears viable for almost any servant other than tanks. Spd-based DPS servants need this gear set to be of any use.
Petrify gears are a very unique and situational set. After the 2.3 update, a set of 4 allows a petrify rate of 5% every time an enemy strikes your servant. With this, petrify on tanks and tower invasion defense servants is extremely viable. This allows servants to possibly have an AOE petrify when attacked in PvP or tower invasion, at a base rate of 5% and a max cap at 10%. Keep in mind that this does not work on Dungeon bosses such as Omen, Iscariot, and Heide.
Wind gears are probably the most underused and underrated gear sets as of this moment. A 4 set allows your servant to have a 50% chance (55% if set is linked) of resetting global cooldown, capped at 85% max. Because it is relatively situational and are harder to obtain, wind gears are neglected. A very interesting perk of the wind set is to disrupt the global cooldown pattern of the enemy. In PvP, many people will time their combo skills right after their enemy uses a skill to “cancel” that skill from happening with their combo skill animation (see Skill Cancelling). However, if you use wind gears on your PvP defense team, the opponent will have more difficulty in timing the combo skill as you constantly change your own team’s global cooldown. Wind gears are most viable on healers and supports, as these servants need the least extra stats from sets compared to DPS and tank servants. With the addition of the World-Raid Boss, and 5-servant team compositions, having wind runes on a couple of servants could boost your overall DPS before you get killed by the boss.
Gearing servants:
This is for servants that have not unlocked gear slots 7 and 8 (by then you should know which stats to choose).
Substats based on priority, leftmost = highest.
DPS servants:

Attack Based Servants:
These servants have their combo skills with the description “Deals x% damage upon skill use. Damage is based on ATK.
Viability:
As of updates 2.2 – 2.4, most attack-based servants received a general buff, with many combo skills increasing in damage. The viability of these servants has increased dramatically since the beginning of the game. For most of the game’s content, with exception of high level abaddon and Sanctuary, attack-based servants will likely deal the most damage out of any servant. This is illustrated with the leaderboards being stacked with Water Lenores and Water Rems.
Gear Options:
Beast Blade (Best Option IMO)
Slots 2, 4, 6: Atk%, CD/CR, Atk%
Substats: CR, Atk%, CD, Acc, Spd
(Need minimum 75% CR)
Havoc Blade (Decent Choice, allows more DMG on primary skills rather than combo skill)
Slots 2, 4, 6: Atk%, CD/CR, Atk%
Substats: CR, Atk%, CD, Acc, Spd
(Need minimum 75% CR)
Spd Based Servants:
These servants have their skills and combo skills with the description “Deals damage based on SPD”.
Viability:
Speed based servants are among the best DPS in the game. With Fire Lucien, Fire Lenore, and other speedy DPS with offensive passives, you can wipe the floor in PvP as well as PvE. These servants, however, are not as viable in tower invasions (unless you have some godly gears) as many tower invasion players put up their speedy shielded Heylel, which could be a pain to kill with speed based servants. Keep in mind that the global cooldown will affect how many skills you can proc before a battle ends, so with an extremely speedy speed based servant, you will definitely not be able to proc all skills from all 4 members of your team. Keep in mind the 350 speed cap that was introduced in the 2.2 World Raid Update. This cap only affects the best of the best players (cough, cough, WHALES), and any normal player would never encounter any issue.
Gear Options:
Eruption Blade
Slots 2, 4, 6: Spd, CD, Atk%
Substats: Spd, CR, CD, Acc, Atk%
(Need minimum 75% CR)
Defense Based Servants:
These servants have their skills and combo skills with the description “Deals damage based on Def”.
Viability:
With 2.3 – 2.4 updates, defense-based servants have fit nicely into certain parts of the game. With the dramatic increase in attack-based DPS in PvP and a significant decrease in ignore-defense in PvP, defense-based servants are looking more and more viable as a secondary tank as well as heavy hitting DPS. In addition, these tanky DPS servants can surprisingly deal almost as much damage as many attack-based DPS servants, given good enough stats. In World-Boss, these servants are especially viable as they can tank any AOE damage the world boss deals easily.
Gear Options:
Havoc Blade/Iron (Iron if you have 75% CR from substats)
Slots 2, 4, 6: Def%, CD, Def%
Substats: CR, Def%, CD, Spd, Acc, Atk%
(Need minimum 75% CR)
Eruption Blade/Iron (An awkward build, but still viable)
Slots 2, 4, 6: Spd, CD, Def%
Substats: CR, Def%, Spd, CD, Acc, Atk%
(Need minimum 75% CR)
Defense Ignore Servants:
These servants have their combo skills with the description “Deals damage that ignores enemy’s DEF”.
Viability:
Defense Ignore Servants go hand-in-hand with Speed based servants in terms of viability. With really only 2 stats to focus on, Speed and Attack, these servants are the easiest to rune, and they can fit into almost any situation. For PvP, defense ignore servants such as Light Gretel, Dark Gwyl, Charlotte, Xita, or Ankou are top tier. They can basically 1-shot every tank in the game given enough attack stat, and consistently at that. You will never encounter anything that is problematic for Defense Ignore servants, other than the high HP world-boss or Heide’s Void when in recovery mode. Overall, defense ignore servants are the best when it comes to general utility.
Gear Options:
Eruption Skill/Chain/Blade (Optimal PvP Setup)
Slots 2, 4, 6: Spd, Atk%, Atk%
Substats: Spd, Atk%, Acc
(Blade if you want some CR to compliment primary skills, Chain if you want slightly boosted combo rate, Skill if you want more accuracy for debuffs)
Beast Skill/Chain/Blade (PvE Setup)
Slots 2, 4, 6: Atk%, Atk%, Atk%
Substats: Atk%, Spd, Acc
(Blade if you want some CR to compliment primary skills, Chain if you want slightly boosted combo rate, Skill if you want more accuracy for debuffs)
Enemy Max HP Based Servants:
These servants have their skills combo skills with the description “Deals damage based on Enemy’s Max HP”.
Viability:
Max HP servants are most viable in Abaddon, Omen, World-Raid, and Awakening Dungeons. As you can guess, the more HP the target has, the more damage they will take. This is useful as you get onto higher and higher abaddon floors, which will in-turn have higher HP bosses. Omen, World-Raid, and Awakening Dungeons in general already have high base HP, so it is a given that these servants would be a good choice.
Gear Options:
Havoc Blade (Slower, harder hitting)
Slots 2, 4, 6: Atk%, CD, Atk%
Substats: CR, Spd, Atk%, CD, Acc
(Need minimum 75% CR)
Eruption Blade (Faster, not as hard hitting)
Slots 2, 4, 6: Spd, CD, Atk%
Substats: CR, Spd, CD, Atk%, Acc
(Need minimum 75% CR)
Tank Servants:
HP-Based Tanks:
Nat4: Dark Ishmael, Forest Torhino, Forest/Water Griselda
Nat5: Forest/Fire Rem, Water Carmilla, Fire Heide
Viability:
HP-Based Tanks excel in PvP. With high enough HP (through multiple transcendance) and a shield up, a tank may be able to survive through the catastrophic damage defense ignore servants may do. These tanks are very good for general PvE as well (as long as it is not Omen).
Gear Options:
Life, Life, Iron
Interchangeable Slots: 2 HP%, 1 Def%
Substats: HP%, Def%, Acc, Spd, HP (flat), Def (flat)
(Accuracy is really only needed for tanks with debuff skill)
Def-Based Tanks:
Nat4: Forest/Fire/Water Executioner
Nat5: Forest Lenore, Water Ankou, Fire Simone
Viability:
Def-Based Tanks excel in PvE, particularly Omen. With high defense, your tank can take less numerical damage from Omen’s Faltering Calamity skill, so your support servants can survive it. For general PvE, these tanks are just as good as HP-Based tanks. In PvP, these def-based tanks are not as good, because many people run Defense Ignore servants as offense and defense.
Gear Options:
Iron, Iron, Life
Interchangeable Slots: 2 Def%, 1 HP%
Substats: Def%, HP%, Acc, Spd, Def (flat), HP (flat)
(Accuracy is really only needed for tanks with debuff skill)
Mixed HP/Def Tanks:
Nat4: Dark Executioner, Dark Griselda, Light Executioner, Light Enoch, Water Rakshasa, Fire Torhino, Fire Usher
Nat5: Dark Rem, Dark Lenore, Light Spiegel, Light Heide
Viability:
All light/dark tanks have identical stats of their same natural star level. The increase in general stats help boost these tanks over their RGB counterparts. Any RGB tank on this list is usually generally good for everything, since they are a mix.
Gear Options:
Iron/Life Gear in General
Interchangeable Slots: Def% and HP% in general
Substats: HP%, Def%, Acc, Spd, HP (flat), Def (flat)
(Accuracy is really only needed for tanks with debuff skill)
Support Servants:
DoT-based Supports:
These supports have one or more DoT skills.
Viability:
As with any DoT servant, these excel in high HP bosses such as Omen, Awakening Dungeons, and even for the higher tier campaign PvE levels. These servants are almost never viable in PvP or Abaddon (hard mode). Building good DoT’ers is a key element to efficient farming for gears and awakening materials.
Gear Options:
Eruption Life/Skill
Slots 2, 4, 6: Spd, HP%, HP%/Acc
Substats: Spd, Acc, HP%, Def%
(Need minimum 50% Accuracy)
Pure Support:
These support servants have little to no debuff to enemy skills, rather they have mostly buff all skills to allies.
Viability:
These supports can give all of your servants a much needed boost in either DPS or survivability. Many dungeon bosses can deal a lot of AOE damage (Omen) and a defense buff to all will help you survive such attacks. These supports are not very good in PvP unless they provide a strong shield buff.
Gear Options:
Eruption Life/Iron (Typical Support Build)
Slots 2, 4, 6: Spd, HP%/Def%, HP%/Def%
Substats: Spd, HP%, Def%, Acc
(Accuracy is only needed if servant has a debuff skill)
Petrify Life/Iron (Stalling purposes, useful for Tower Invasion and non-dungeon PvE)
Slots 2, 4, 6: Spd, HP%/Def%, HP%/Def%
Substats: Spd, HP%, Def%, Acc
(Accuracy is only needed if servant has a debuff skill)
Wind Life/Iron (Faster Global Cooldown (GC) for other servants)
Slots 2, 4, 6: Spd, HP%/Def%, HP%/Def%
Substats: Spd, HP%, Def%, Acc
(Accuracy is only needed if servant has a debuff skill)
Chain, Chain, Chain/Life/Iron (Achieves 80-85% combo into secondary mark rate)
Slots 2, 4, 6: Spd, HP%/Def%, HP%/Def%
Substats: Spd, HP%, Def%, Acc
(Accuracy is only needed if servant has a debuff skill)
Healer Servants:
Heal-DoT servants:
These servants have a heal and a DoT skill.
Viability:
These servants are especially useful for PvE dungeons, being as good as support DoT servants because they provide a heal.
Gear Options:
Eruption Life/Skill
Slots 2, 4, 6: Spd, HP%, HP%/Acc
Substats: Spd, Acc, HP%, Def%
(Need minimum 50% Accuracy)
%Heal servants:
These servants have a heal based on allies’ HP. They have the description “Heals HP of all allies by x%”.
Viability:
For late game, these healers will be the most useful because they heal a consistently high amount of HP.
Gear Options:
Eruption Life/Skill
Slots 2, 4, 6: Spd, HP%, HP%/Acc
Substats: Spd, HP%, Def%, Acc
(Accuracy is only needed if servant has a debuff skill)
Wind Life/Iron (Faster GC for other servants)
Slots 2, 4, 6: Spd, HP%/Def%, HP%/Def%
Substats: Spd, HP%, Def%, Acc
(Accuracy is only needed if servant has a debuff skill)
Heal Based on Own HP:
These servants heal based off of their own Max HP.
Viability:
For early game, and possibly late game (With very good HP% runes), these servants can be very good healers. If your HP stat is high enough, you could fully heal a tank servant, as opposed to the maximum 80% or so for %Heal healers.
Gear Options:
Eruption Life (Typical Healer Build)
Slots 2, 4, 6: Spd, HP%, HP%/Acc
Substats: Spd, HP%, Acc, Def%
(Accuracy is only needed if servant has a debuff skill)
Life, Life, Life (For Stronger Heals, but more cooldown)
Slots 2, 4, 6: Spd, HP%, HP%/Acc
Substats: Spd, HP%, Acc, Def%
(Accuracy is only needed if servant has a debuff skill)
Wind Life (Faster GC for other servants)
Slots 2, 4, 6: Spd, HP%, HP%
Substats: Spd, HP%, Def%, Acc
(Accuracy is only needed if servant has a debuff skill)
Heal Based on Own Def:
These servants heal based on their defense stat.
Viability:
The scaling for defense-based healing is higher than HP-scaled healing. As a result, you can get a stronger heal with defense than HP. However, there is only one healer as of right now that has this unique heal, Fire Griselda, a Nat4. As a result, many, if not all Nat5 Healers will definitely heal more than Griselda, simply because of their Nat5 higher HP base stat. Fire Griselda, however, is among the best Nat4 healers due to her revive skill. She is also very strong in Omen’s void because of her Team Def Up skill.
Gear Options:
Eruption Iron
Slots 2, 4, 6: Spd, Def%, Def%
Substats: Spd, Def%, HP%
(No accuracy because Fire Griselda does not have any debuffs)
Heal Based on Attack:
These servants heal based on their attack stat.
Viability:
As of this moment, only Forest Heylel has this unique heal based on attack. She is most likely the best at Dark Awakening Dungeon F11 because she is a healer and can dish out a fair bit of damage. Of course, she is still good in general as a healer.
Gear Options:
Eruption Life/Iron
Slots 2, 4, 6: Spd, Atk%, Atk%
Substats: Spd, Atk%, HP%, Def%
Omen’s Void:
Omen’s Void is a gear dungeon that drops high level gears from the Beast, Life, Iron, Eruption, Vampyre, and Blade sets. This should be a top priority because the gears you get from this dungeon will carry you throughout the rest of the game. An geared servant is exponentially better than an ungeared servant.
Tank Choice:
There are plenty of Omen’s Void guides out there, however most of them do not highlight the most important aspect of building a team for Omen, your tank. When you first attempt any floor of Omen, you begin to realize that Omen does massive damage after you use 10 skills. His Faltering Calamity is known to wipe out teams completely.
Based on the description, Omen is supposed to “deal damage to all enemies equal to the amount of damage received”. HOWEVER, as I have figured out over thousands of Omen runs, this extra damage is absolutely NEGLIGIBLE. As it turns out, the damage that your servants take (AOE) is exactly the same for all. As a result, the more DEFENSE your tank has, the less NUMERICAL damage your tank will take (not necessarily how much of the tank’s %HP). For example, a tank like Ishmael could have very high HP and relatively lower defense. Omen’s Faltering Calamity could do around 35k damage to Ishmael, which if you geared him correctly, will be around 70% of your Ish’s health. Your Ish survives easily. However, that 35k damage will be the same for all the other servants you have on your team. For most servants, with the exception of especially beefy supports such as Ophelia, they will not survive 35k damage unless they have over 35k health.
Now, if you choose a more defense-based tank for Omen, such as Water Ankou or the Executioner line, you will undoubtedly have less HP than Ish. As long as your defense-based tank has a okay amount of HP (+120% HP in gear) and very high defense (+150% Def in gear), calamity will do only 5-15k damage. This 5-15k damage is much more manageable for your DPS or support servants to survive if they have that much HP.
Primary Damage Dealers:
In the first couple of floors of Omen, you should be able to clear him with relative ease with a couple 5* DPS servants a tank, and a healer. However, if you want to clear the upper floors, you will definitely need a couple of DoT servants. When building DoT characters, be sure to skill their DoT skills up to the max because they will hit their DoT debuffs much more often. Keep in mind servants that have the type disadvantage will deal 0 damage on their DoTs.
Some very popular DoT’ers are:
Combo Skill = DoT is applied on combo skill
Double DoT = Two primary skills have different DoTs
BOLD = Recommended
Healer = Healer
Nat3 DoT’ers (Easy to Skill-Up, Cheap to build):
Fire Nutkin (Healer)
Water Nutkin (Combo Skill)
Water Moira (Healer)
Water Grisette (Healer)
Light Dunkelhund (Healer)
Light Nuamaan (Combo Skill)
Light Grisette (Combo Skill)
Nat4 DoT’ers (Harder to Skill-Up, Uncommon):
Fire Laura (Double DoT)
Fire Belladonnas
Water Laura (Combo Skill)
Water Torhino (Healer)
Water Reynar
Water Mary (Combo Skill)
Forest Koume
Forest Laura (Double DoT)
Forest Mary (Healer)
Light Griselda
Light Laura (Double DoT)
Dark Laura
Dark Mary
Nat5 DoT’ers (Very hard to skill-up, Very rare)
Fire Blavatsky (Triple DoT, arguably best DoT servant for Omen 10)
Fire Eimyrja (Healer)
Water Sphinx
Water Heylel
Water Lucien
Water Leto (Double DoT)
Forest [A] Lucien
Forest Leto (Double DoT)
Light [A] Heylel (Double DoT)
Dark Blavatsky
Dark Eimyrja (Healer)
Dark Sphinx (Double DoT)
Dark [A] Lucien (Healer)
Healer Choice:
There are plenty of healers to use, however it is best if you choose a healer that does DoT Damage as well (listed above). Try to tack on as much speed and HP on your healers as possible. If you have a good enough tank and HoT (Heal over Time) support, you may not require a designated healer at all.
General Support:
People tend to stray away from these, however they are more useful than you’d think. All Omen’s have an AOE defense down debuff, which could debilitate your defense-based tank’s defense, which could prove fatal after a calamity. This is why supports with debuff removal on allies are very important. They can clean up the stacked defense drops on your party, strengthening your survivability. In addition, if your tank does not have very good defense (due to lack of gear), you could use a support that has a defense up all skill. Some useful general supports would be:
BOLD = Recommended
Nat3:
Fire Moira
Dark Dorrit
Nat4:
Light Ophelia
Light Hern
Dark Rakshasa
Nat5:
Fire [A] Heylel
Water Heylel
Water Lucien
Forest Blavatsky
Dark Sinistra
Other General Tips for Omen:
In Omen 10, you may be a bit confused when you see three and four star gears dropping. These gears are rings and necklaces, only found in Omen 10 and 11. They help with completing the 7th and 8th gear slots once you are on Awakening 3 and 5 on a servant. In Omen 11, keep in mind that he only drops ring and necklace gears, albeit very good ones. Because of this, unless you have a bunch of servants that are awakened 3 and higher, you do not need to build a team for Omen 11.
Heide’s Void:
Heide’s Void is a gear dungeon that drops high level gears from the Havoc, Wind, Chain, Petrify, Resistance, and Skill sets. Heide’s Void F11 will only drop Rings and Necklaces.
Tank Choice:
In Heide’s Void, tank choice does not really matter as much as in Omen. You can use an HP or Defense-based tank depending on which one you have built better. As long as you have a Nat5 6* tank or a Trans 1-2 Nat4 Tank, you should be able to use them for Heide’s Void effectively. A suggestion when picking a tank would be to find the element advantage, because a higher chance of glancing hit really helps for survivability. Also, Heide’s Void is significantly harder on point DPS than Omen, so your tank has to have minimum 50k HP and 1k defense to auto Heide 8 or 9+. Your DPS servants are not necessarily affected as much by AOE damage unless you do not dish out enough damage to negate Heide’s recovery phase.
Primary Damage Dealers:
As opposed to Omen where you have to focus almost completely on DoTs to kill him, for Heide, you will be using DPS servants with high CR. The most efficient DPS servants to choose from would be Speed based servants with high CR. They will dish out massive damage at a quick pace in order to break Heide’s shield in recovery phase. Another viable choice would be Max HP DPS servants. These will deal a formidable amount of damage to Heide. You could also use attack-based servants, however as with any other piece of content, they are a bit underpowered along with defense-based. Defense-ignore servants will not be effective in Heide’s Void, as they will diminish your Auto’ing ability.
As for secondary DPS, you could surprisingly, use DoT servants to deal damage while Heide is not in recovery phase. Because Heide’s HP gets fairly high (not as high as Omen) in the upper floors, it is not a bad idea to use DoTs to chip away at him faster, especially if your DoT servant is a healer as well.
Healer Choice:
A speedy DoT healer with elemental advantage would be your best choice for Heide. Their DoT skills could provide the extra boost in DPS to clear Heide faster, and a reliable, full or nearly full heal with at least 160 speed would be ideal.
General Support:
If your tank is bulky enough to tank Heide’s constant defense drops, you can run 2 DPS servants as opposed to one. However, in most cases, your tank will not be able to tank Heide, so a debuff removal, HoT, or def-up support would be a good option. Running Light Ophelia or Water Heylel would significantly boost your tank’s overall survivability, thus allowing you to Auto Heide with ease. Of course, when you get better runes, you could go for speedrun Heide’s Void with 2 DPS.
Other General Tips for Heide:
Do not focus on building a team for Heide’s Void until you have successfully built a team for Omen’s Void. Heide’s Void does not drop integral gear sets such as Eruption, Life, Iron, and Blade like Omen does. Rather Heide drops fairly niche gear sets such as Resistance, Wind, Chain, and Petrify. Skill and Havoc are really the only gear sets that are the most viable that Heide drops. It is better to focus on Omen in my opinion until you get to late game where Havoc, Wind, Chain, and Petrify are useful.
Awakening Dungeons (Floors 1-10):
In general, Awakening Dungeons are fairly easy to kill, with exception of maybe Forest Dungeon if you don’t have good DPS/Heal Block or Fire Dungeon if you do not have a good tank/healer. These dungeons drop essential stones that are needed to awaken a servant and unlock extra skill-ups, important passives, extra gear slots, or a link skill.
The tips given are based around Floor 10 of all the awakening dungeons. You could still follow the tips I give for lower floors, but it really depends on the stats of your servants. If you cannot do F10, you need better stats on your tank or DPS. If you are running DoTs and you are having trouble, try to skill them up to have max apply rate (not accuracy).
Magic Dungeon:
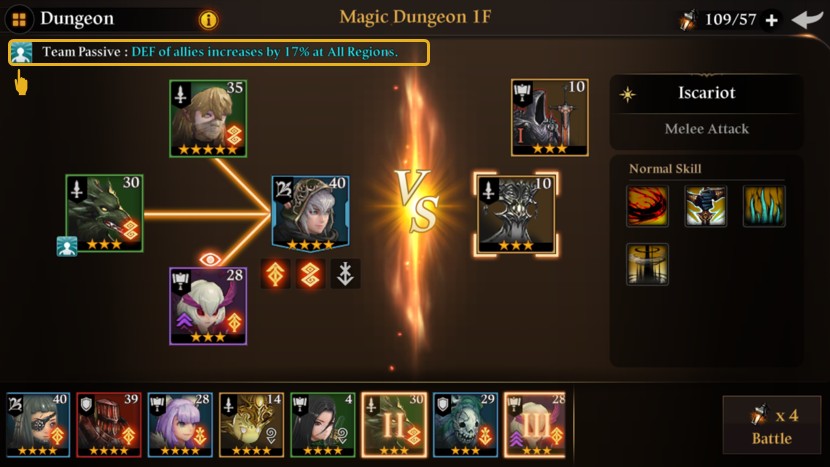
Similar to Omen’s Void, your main strategy for defeating Iscariot of the Magic Dungeon will be DoTs. Iscariot has a formidable amount of health, so DPS’ing him is not easy or efficient unless you have a transcended servant or a 4th Awakened Forest Xita.
Tank Choice:
Honestly, Iscariot does not dish out that much damage. Any decent tank, either HP or Defense-based is fine. With a 6* Nat4 or Nat5 tank, you can easily survive with a healer or a support HoT if you have good stats. Even Ishmael, who has type disadvantage can tank Iscariot easily.
Primary Damage Dealers:
DoT servants are the way to in Iscariot of Magic Dungeon. See Omen’s Void guide to choose an optimal DoT servant for you.
Healer Choice:
Optimally, a healer with a DoT skill as well would be the best choice. Otherwise, a normal healer will do fine to keep your tank alive.
General Support:
With a good support such as Water Heylel or Light Ophelia, you don’t even need a healer. Magic Iscariot simply does not dish out enough damage to even warrant a healer unless you have a weak tank.
Other General Tips for Magic Dungeon:
Optimally, you could go for a 3-servant team with Tank-Support-DoT, or even a 2-servant team with Tank-DoT support if you have a water or forest Leto. If you feel like your tank cannot stay alive for long enough, then choose a healer.
Floor 11 Magic Dungeon:
F11 is super easy to clear if you can clear F10 with DoTs. Simply deploy the same strategy.
Fire Dungeon:
The Fire Dungeon has an attack-based Iscariot. He dishes out the most damage of all the other dungeons, but keep in mind that he also has lower HP and defense than his elemental counterparts.
Tank Choice:
For the Fire Dungeon, I recommend any 6* water tank, whether it be Water Executioner, Rakshasa, Griselda, Ankou, or Carmilla. With decent gear, you should be able to tank Iscariot of Fire Dungeon easily with a general support HoT or a healer.
Primary Damage Dealers:
There are two ways you can successfully clear Fire Dungeon. You can either go with the general DoT method, similar to Magic Dungeon and Omen’s Void, or you can go with the DPS method, which needs well-built DPS servants. The DoT method is much easier to do because you can use these DoT servants in almost all Awakening Dungeons and Omen’s Void. In addition, you don’t need the best gears for DoT servants. The DPS method, given that you have exceptional gear, is most likely quicker. DPS servants based around Enemy Max HP, Speed, and Defense-Ignore will probably be the most efficient.
Healer Choice:
Similar to Magic Dungeon, really any healer works, as long as you can keep your tank alive. Optimally you could use a DoT healer for extra damage.
General Support:
Again, similar to Awakening Dungeon, with a good enough tank, you could replace the healer with a HoT support.
Floor 11 Fire Dungeon:
To clear Floor 11 Fire Dungeon, you need 4 tanks servants in the same team. An easy way to clear Fire Dungeon is equip one or two of your tanks with Vampyre gear. This will help them dish out higher damage and allow them to heal themselves to stay alive long enough before catastrophe comes.
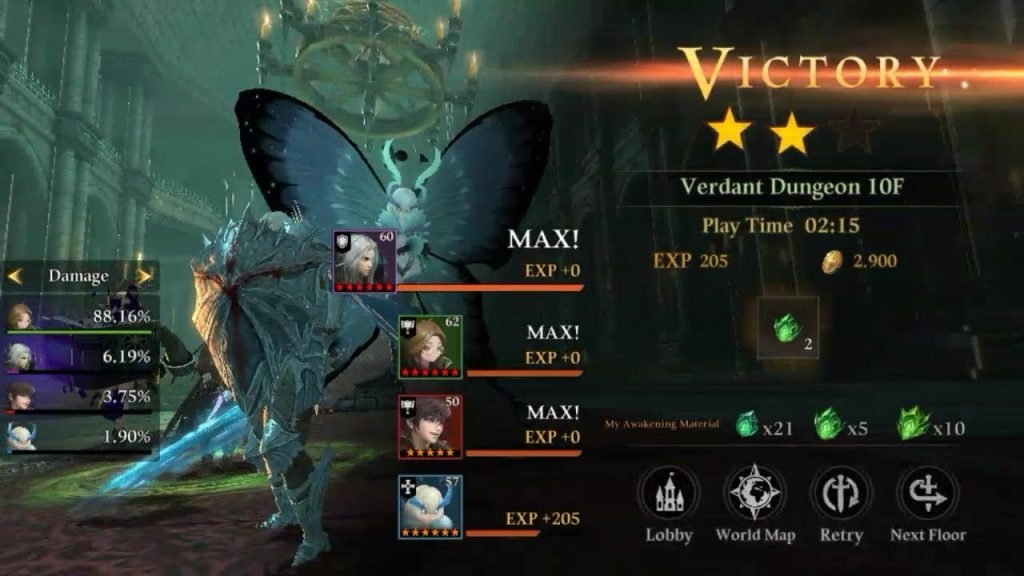
Verdant Dungeon:
The Verdant Dungeon has a Healer Iscariot. At around 1.5 or so minutes, the supporting statue will heal Iscariot by 50% of his HP. Heal-Block servants are recommended, but remember that the statue may remove the heal-block debuff.
Tank Choice:
Verdant Dungeon does not really dish out that much damage compared to Fire Dungeon. Any 6* tank that is not water element will probably be enough to survive as long as you have a decent healer.
Primary Damage Dealers:
Unless you have a Fire Blavatsky or a fast well-built DoT team, do not use any DoT servants on Verdant Dungeon. They simply do not dish out enough damage fast enough to outpace the statue’s heal. I would either go with a heal-block set of DPS, support, and tank servants, or you can go full DPS if you can deal massive damage quickly. A servant that is cheap to build and a reliable heal-blocker would be a 100% Crit Rate Awakened Forest Enoch. If you do not have good enough DPS to kill Iscariot before heal comes, then you should definitely consider building a forest Enoch just for this dungeon. He does not need to be a 6*, he just needs to have high CR, be fairly speedy, and be awakened. Of course, you could also go with any of the other multitude of heal-blockers out there, many of whom are Nat3 and are even cheaper to build. However their Heal-block might not be applied for long because of the statue’s debuff removal skill.
Healer Choice:
There aren’t any particular healers that you need to choose from. Verdant dungeon does not dish out considerable damage so any generic healer should do their job fine. If your healer can heal-block or has a DoT skill, it would be a nice bonus to have.
General Support:
These servants are not really needed unless they are your designated heal-blocker.
Floor 11 Verdant Dungeon:
For this floor, you are only allowed to use Ranged DPS servants. Because of Iscariot’s continual HoT every time he procs a skill, you will need considerable DPS. The most effective servants to use in Verdant Dungeon would be DPS servants based on Max HP or DPS servants that are speed-based. My top two suggestions would be a Fire Leto or Fire Lucien. Surprisingly, you could also use Water [A] Lucien fairly effectively if you get lucky and do not glance. If you dish out enough damage but are not tanky enough to survive until he is dead, you might want to consider putting vampyre gear on your servants. If you do not have any Nat5 Ranged DPS, you could use their Nat4 counterparts, however your options are more limited.
Abysmal Dungeon:
The Abysmal Dungeon has an HP-based Iscariot. He has the highest base HP stat of all other awakening dungeons. Therefore it is best to kill him with DoTs.
Tank Choice:
Any 6* forest or water tank will suffice, Abysmal Iscariot does not do that much damage. Consider having a forest tank for the extra chance of glancing hits.
Primary Damage Dealers:
Your best choice for this dungeon would definitely be DoTs. See Omen’s Void guide above for the best choice of DoT servants. Be sure it is not a Fire-based DoT’er.
Healer Choice:
Just like all the other dungeons, it would be best to have a DoT healer for extra fast clearing, but you could use a normal healer just as effectively.
General Support:
Iscariot does not dish out enough damage to warrant using one here.
Floor 11 Abysmal Dungeon:
This dungeon requires 4 support servants. Lucky for you, most prominent DoT servants are also supports. As a result, just run your typical DoT team, just without a tank. If you want more survivability, try to use HoT or shield supports such as Ophelia or Water Heylel.
Radiant Dungeon:
The radiant dungeon houses a defense-based Iscariot. He has a massive defense buff passive, pretty much negating the vast majority of damage that your DPS servants would normally do.
Tank Choice:
Radiant Iscariot does not do that much damage, so any RGB tank that is 6* should be enough, provided you have a healer.
Primary Damage Dealers:
There are two ways you can deal damage to this Iscariot. You could go the typical DoT method, or you could go with a defense-ignore DPS method. If you have powerful enough defense-ignore DPS servants to kill him at a fast pace, then definitely go with that. Otherwise a simple DoT team works just as good, just slower.
Healer Choice:
DoT healers are again top choice, but any other healers will also work.
General Support:
If you are running a defense-ignore strategy, you might want to try a speed-buffing support to help you proc as many combo skills as possible. Otherwise, supports are not needed.
Floor 11 Radiant Dungeon:
Since you can only being melee DPS servants, using your defense-ignore servants is the way to go. There are now a decent amount of defense-ignore servants in the game, from Nat3 to Nat5. Choosing 3 of them and inserting them into the team should be enough to kill Floor 11 Radiant Iscariot with ease.
Dark Dungeon:
The Dark Iscariot is accuracy-based, meaning he will hit debuffs on your servants more easily. In addition, his damage output is also higher than the others, but less than the Fire Iscariot.
Tank Choice:
Having a good tank such as a 6* Ishmael or an RGB Nat5 tank is needed as he does a decently high amount of damage. If you have a good healer, then tank stats do not have to be exceptional.
Primary Damage Dealers:
The safest option to deal damage is with the typical DoT method. You could also try the the pure DPS route, as long as you have transcended DPS servants that dish out massive damage.
Healer Choice:
DoT Healer… once again.
General Support:
Any support servants that increase your survivability would be useful here.
Floor 11 Dark Dungeon;
This dungeon requires 4 healer servants. As long as you have geared out your 4 healers well (high HP, high speed), you should be able to kill him easily. If not, you may want to try attack based vampyre sets on one or two of your healers. This offensive healer will stay alive long enough to dish out large damage.
PvP:
Updated for 3.2
PvP (3 servants):
Just like any other game, PvP requires speed. The faster your servants are, the faster they will use their combo skill to kill enemy tanks faster. For 3v3 PvP, you should learn how to skill-cancel, as well as know relation skills. Ideally, you would want a tank, a DPS, and a healer/support for your PvP team. If you can fit in a link buff (relation) in there, this will benefit extremely well to your overall team. Your support or healer should have high chain rate and ideally should chain into your DPS. As for gear, your tank and support/healer should have a set of Wind on them, since stacking up buffs/debuffs in a short amount of time is extremely advantageous in PvP. If you find it hard to survive an enemy DPS’s skills, you can skill-cancel them. AOE servants also work very well in PvP (against melee units). Revive healers are very effective, but since the recent patch 3.2.3, you NEED hard-hitting DPS servants to pair with them. If you do not kill the opponent, and you have revived, the HP of your revived servants do not count if the match goes into a stalemate and ends due to time limit.
Take advantage of the matching system and attack only people that you are confident in winning. If you just kill low-ranked players at a 100% victory rate, you can climb up the leaderboards fast. If you are high-ranked, and have no “easy” opponents to beat, try looking in your revenge log for easy opponents there.
Infinite PvP (4 servants):
In infinite PvP, it is 4v4, and the entire battle is set on auto, so you cannot skill-cancel or manually select skills. As a result, wind gear is the absolute king in this mode, since the auto AI is quite dumb sometimes. Getting a team with a relation effect or multiple combos is necessary to climb the ranks. Otherwise, same strategies apply here in IPvP as well.
Recommended DPS Servants:
Nat5:
All Xitas, built with high speed, high attack
Forest and Fire Lucien, built with high speed, high CR, high CD
Water Blavatsky, built same as Luciens
Water Lenore, built with decent speed, high attack, high CR, high CD
Water Rem, build with decent speed, high attack, high CR, high CD
Fire Ankou, build with high speed, high attack
Other Atk-based/Def-based DPS
Nat4:
All Charlottes, built with high speed, high attack
Forest Belladonnas, built with high speed, high CR, high CD
Dark Enoch, build with high speed, high attack
Fire Enoch, built with decent speed, high attack, high CR, high CD
Nat3:
Light Gretel, built with high speed, high attack
Dark Gwyllgi, built with high speed, high attack
Recommended Support/Healer Servants:
Nat5:
Water Heylel, built with high speed, high accuracy, high HP, high chain
Light Usher, built with high speed, high accuracy
Fire [A] Lucien, built with high speed, high HP
Fire Spiegel, built with high speed, high HP, high chain
Water [A] Leto, built with high speed, high HP, high accuracy, high chain
Nat4:
Fire Griselda, built with high speed, high defense
Recommended Tank Servants:
Nat5:
Fire Heide, built with high HP, high defense
Nat4:
Dark Ishmael, built with high HP, link skill provides huge boost
Tower Invasion:
Defending:
A good tower invasion defense is to put servants that can heal themselves, put shields on themselves, or are very high, speedy DPS servants. Healers or supports that can put up shields or heal themselves are harder to kill, especially when the opponent’s DPS is not high enough to outpace your servant’s healing capabilities. A transcended DPS servant may also be a huge threat to an opponent because you can destroy their tank very quickly before they can destroy you.
Recommended Defense Servants:
Water Heylel: Her completely defensive skillset is the best in the game right now for tower invasion. She can heal herself easily without threat from Heal-Blockers with a Max HoT. She can conjure a shield to tank combo skills. She can remove defense breaks applied on her. Her silence all combo skill can silence the enemy until she can proc another shield and HoT.
Fire Lucien: Fire Lucien’s damage output in tower invasion is massive, capable of melting through tanks if transcended. Her speedy combo skill recovery allows her to proc combo after combo, giving opponent little time to heal their weakened tanks.
Light [A] Lucien: Although extremely hard to pull, if you manage to get her, she is top tier in tower invasion. With an already high damage output, you are essentially putting two versions of her in one slot due to her recovery passive. Once she dies, she will revive herself at max HP, allowing her more time to kill your opponent.
Attacking:
When attacking tower invasion, there are several ways you can work around certain defending servants.
Tanks:
For high HP tanks such as Ishmael and Fire Heide, you can simply use your Omen or Magic Dungeon DoT team to slowly chip them down with little risk. If the tank has immunity up most of the time, you could use defense-ignore DPS to chunk away at the opponent.
Healers:
Dealing with healers are a bit more tricky. If you do not already have a top-tier DPS, you should try and use Heal-Block servants. Sometimes, however, you will definitely need a defense-ignore or speedy DPS to kill the healer as quickly as possible due to their ability to remove debuffs from themselves. If you are chipping down the healer very slowly, consider killing the monument first so that you do not get wiped by the catastrophe.
DPS:
The game is simple, kill it before it kills you. You could also try using your combo skills to cancel out the opponent’s skills if you time it correctly right after they use a skill.
Supports:
Supports often have high HP, speed, and debuff removal abilities. Thus, your best choice is most likely a defense-ignore servant.
Water Heylel:
She deserves her own category because of how extremely difficult it is to kill a well-built Heylel as an intermediate to mid-late game player. The main type of servant that you need is a buff removal servant. A good choice for this would be Dark Dunkelhund, who is easy to build because he is a Nat3. In addition, you need a defense-ignore servant. Any decently built tank should work fine. If you have another buff remover, you can also add them to the team to keep Heylel’s bubble popped.
To safely kill her, I would recommend killing the tower first if your DPS output is not that good to kill her within the first three or so minutes. Then, time your buff removal skills right after she procs her 2nd skill, which gives her a HoT and a bulky bubble. Do not try and pop this bubble otherwise unless you have top-tier transcended defense-ignore servants. Once you have removed her buffs, proc your defense-ignore skill. Repeat this process, every time she procs 2nd skill, proc buff removal. Then deal as much damage as possible before she recharges again. If your buff removal skill is too slow in comparison, just wait out the shield and HoT until she procs it again, or else you will be stuck in an undesirable loop of Heylel healing until she is full again. It is better to let her heal like 15% of her health with one full HoT rather than remove her buffs just as she is about to proc another one.
Water Lenore:
Water Lenore’s passive skill makes her extremely difficult to kill, because she almost always takes only glancing damage. This means you can never cast any debuffs on her and your damage output is halved. As a result, any non-defense ignore servants will do little to no damage to her at all. Her status as a DPS servant also makes it extra difficult because she will kill your tanks quickly. To successfully kill her, you should focus on speedy defense-ignore servants. These servants will deal the most damage because their combo skills are not affected by debuffs as much. You should also bring a good healer to help you stay alive longer to proc another combo skill to finish Lenore off.
Abaddon Tower (Normal and Hard):
Normal Mode Abaddon:
Normal mode abaddon is fairly easy to clear, as servants do not have access to awakening stages 3-5. Overall, these servants should be easy to clear with decently geared 6* team that has the element advantage. If you cannot clear normal mode abaddon, I suggest you to get your servants to 6* and gear them with at minimum 5* gears and proper gear sets and stats.
For the last boss at floor 100, you should bring two DPS servants, a healer/support, and a tank. Since there are four stages to the final boss, and the damage you deal cannot transfer over to the next stage (similar to Heide’s Void shield mechanics) you should try and time your combo skills to right after a stage begins. For example, on her first stage, you should simply attack without using any combo skills until she reaches second stage. The moment she switches over and summons a new supporting servant, proc all of your combo skills to quickly move on to the third stage. Occasionally, a tank servant will be summoned by the final boss. Keep in mind that tanks can taunt, so make sure you know which boss you are hitting with your combo skills so you do not waste one on the tank.
With good enough DPS and a solid enough defense, you should be able to clear floor 100 of normal abaddon fairly easily.
Hard Mode Abaddon:
Hard mode abaddon is significantly harder (obviously) than normal mode, mostly due to the much steeper difficulty curve as you progress and the defending servants’ higher tier awakening stages. For anyone who can clear floor 100 of normal mode abaddon, floors 1-50 should be fairly easy. Once you get to 60+ floors, the difficulty is ramped up by a large factor. The introduction of higher tier awakening status, especially for mini-bosses every 5 levels is where progress is much slower. Sometimes, the defending bosses will have a link skill that corresponds to their partner or to your servants, keep this in mind when formulating strategies on how to beat these floors. As the bosses get harder, their HP gets higher and higher. As a result, DPS servants based on Enemy’s Max HP shine in these floors and can even out damage speed-based and defense-ignore servants. However, it is still recommended you keep some defense-ignore servants in play just in case of a high defense tank or a bulky support such as Water Heylel. To progress above floor 70-80, you will definitely need a transcended team, especially if your DPS servants are not fully skilled up.
Another method that can be used is to exploit silence servants. AOE silence servants such as Water Heylel and Light Usher can delay a statue’s catastrophe, as well as limiting enemy DPS by a large factor. This will allow you to slowly kill the enemy without being at too much of a risk of failure. However, this requires a fully skilled up and geared Usher/Heylel to pull off, which can be expensive to build.
World Raid:
Tackling world raid can be very challenging for newer to mid-game players. The best advice I would give to you is if you cannot survive the boss for more than 1-2 minutes, you should sacrifice a DPS servant for a support or a healer. If you can only proc a DPS servant’s combo skill once before it dies, you definitely need to beef up your team more (using shields and constant healing, NOT adding defensive runes to your DPS).
Once you can survive the boss for a decent amount of time, you could try to find combos between supports and DPS servants. This will greatly increase your damage output because supports are already built on high speed, and can chain easily into your DPS.
Guild Dungeon:
Guild dungeon isn’t really any different from normal PvE. Basically just formulate a team in the same fashion you would do for any other tile on the map. For Bastille, the guild dungeon boss, you may need to bring a solid healer, tank, and multiple DPS or a DPS and support that can combo into the DPS. DPS servants that are based on Max HP work best in this boss, due to its high HP. Other DPS servants can also work, but they may need to be heavily geared or at least Awaken 3+ or Transcended 1+.
Team Building:
For early-game purposes, a tank, a DPS, and a healer are the three main servants you should always have on your team for PvE tiles, early-game PvP, Abaddon, guild dungeon and Heide’s Void. The 4th slot can either be filled with another DPS, or a support that can combo into your current DPS. Keep in mind any elemental advantages or disadvantages that may affect your team’s performance.
For early-game PvE dungeons such as Omen or Awakening (Iscariot) you will need a slightly different team setup. You can of course, still use normal DPS to brute force your way through the dungeons, but that may slow your runs down in comparison to the faster DoT method. Omen and Awakening dungeons can be dealt with by using a DoT support/DPS, a healer, and a tank. The 4th slot could be another DoT support. If you feel like the 4th slot is slowing you down, feel free to remove it. When running a DoT team, make sure to never proc the combo skills of any servant, as it will definitely slow your time down.
For mid-game to late-game players, team comps are definitely much different. For tiles (assuming you are now on higher level tiles or sanctuary tiles), you will need a tank, DPS, preferably another DPS, and a combo-able support with HoT or generally a cleansing ability. This allows you to rely on HoTs as opposed to heals and have a high combo rate with your DPS, saving a slot for another DPS. Any links (awakening 4 passive skills) between servants should always be used if your servant is at awaken 4. This team comp applies for most content of the game, and even in Omen and Awakening dungeons. Once you get your DPS servants transcended, you will be able to clear all this content much faster with brute force as opposed to using DoTs.
Shard Farming:
Shard farming is something that is best done alongside EXP farming. If you can find an EXP tile that has a character you want as the boss, you can just farm that tile over and over while grinding EXP for leveling, fusing, and evolving. Over time, you will be able to get enough shards to summon that specific servant.
A couple things to keep in mind is when you are farming for any L/D servant, the rates will be lowered significantly compared to normal RGB elemental servants. In addition, farming in sanctuary tiles has a higher shard droprate than normal tiles, however at the cost of much more valor, as well as difficulty in clearing them.
In my opinion, the best places to farm shards is in the world map on an EXP tile, because you can relatively easily solo these tiles with an EXP farmer in a short amount of time.
Black Market Farming:
If you have a huge excess of gold, this is a viable strategy to obtain summoning and awakening materials. From a karat usage only standpoint, it is more efficient to refresh the black market over and over to collect epic summon stones, twilight summon shards, legendary shards, and some supreme awakening stones. However, keep in mind that this drains A LOT of gold, so be careful when farming the black market. I would only recommend this to mid-game players who do not have access to potentials yet (due to lack of awakening F11 and 12 teams). This is because you likely have a ton of gold with no usage for it. However, for late-game players, gold is a scarce resource due to potentials, so farming the black market is not the best idea.