How to Cannon Like a Pro
The Basics
First things first, i’m going to cover the very basic mechanics of cannons. Even if you have fired a cannon before you should still read over part 2 in case there’s a mechanic i’m listing that you don’t know about.
A good cannoneer is someone who can 1v1 well. Tamers, Ninjas, Kunoichis, Sorcs, Berzerkers, anyone who can win a 1v1 very fast will be a good cannoneer. As a cannoneer you will be wanting to avoid the enemy finding your cannon, but when they do you will want to kill whoever finds you as fast as possible so you can continue firing until the enemy brings a stronger force.
If you have never touched a cannon before then you should buy a practice cannon and a few cannonballs from the guild manager. Note that you will need a guild quartermaster or officer to buy them for you if you don’t hold either of those roles within your guild.
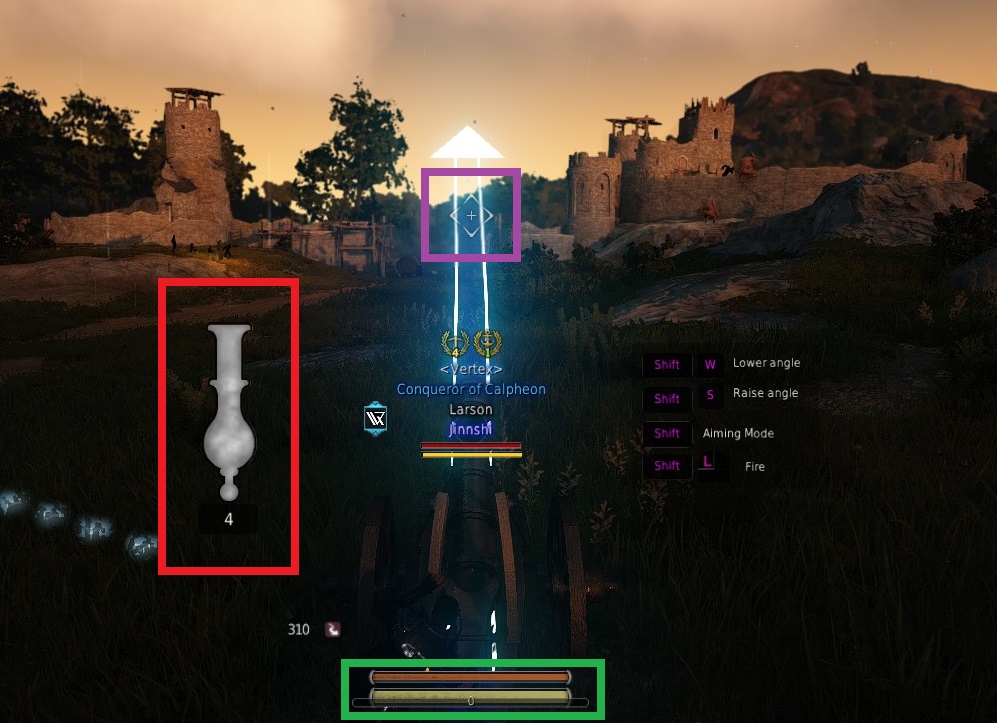
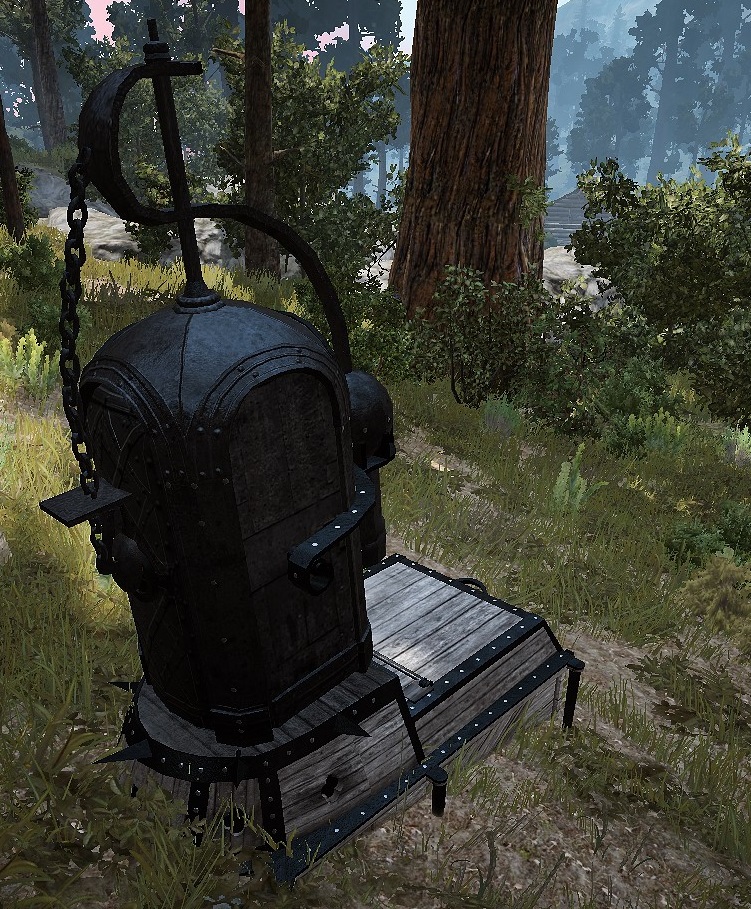
The Red Box is the Cannon recharge meter and the ammo count. When you fire the cannon, that large white cannon icon will turn red, and you won’t be able to fire again until it’s back to white. The ammo count is, obviously, the current amount of cannonballs inside your cannon.
You put ammo inside the cannon by pressing f5 on it, and storing cannonballs from your inventory into the cannon. When firing the cannon will take from whatever stack is on the left. Keep in mind that any cannonballs put into a cannon can never be taken back out, so if your cannon dies or you want to pick up the cannon with ammo in it, you are SoL and that ammo is gone.
After you fire a shot you can dismount, but the cannon won’t cool down; the cannons recharge timer will pause until you are back sitting on the cannon.
The Green Box is the cannons health bar, the lifespan bar, and the charge meter. The health bar is pretty explanatory; it is the cannons current health. When the cannons health reaches 0 it breaks. The lifespan bar is completely pointless, all it does is obscure the charge meter.
The charge meter is the stamina bar that appears when you hold shift on a cannon. As you hold left click the charge meter will fill up until it reaches 100. I’ll go more into this later.
The Purple Box is the aiming reticle. This is the same reticle as you can see on the ground. As long as you don’t adjust your camera side to side from the default, this aimer will be dead center where your cannon is firing.
You can see that line bar aimer pointing out from the cannon’s barrel, just try and pretend that it isn’t there. The line bar aimer bends itself randomly and isn’t as useful as the reticle so just ignore it.
The Controls of a cannon are simple, and explained on the right side of the cannon. You can get on a cannon and move it around all you want.
Whenever you hold shift, you enter aiming mode. In aiming mode the cannon will rotate to aim it’s barrel towards your reticle. When you are in aiming mode you can press W or S to adjust the angle you are firing at, and then you can hold left click to charge up your cannon, then release left click to fire.
In a node war or a siege cannons come out of cannon observatories. They take 5 minutes to craft inside the observatory then anyone can go up to the observatory and press R to take a cannon out (just make sure to start it back up again). You can only place as many cannons as you have observatories, but you can hold unlimited cannons. So if you have 2 cannon observatories then you will only be able to place 2 cannons, but you can hold 4 in your inventory, so if one breaks then you can place another right away.
If a cannon observatory is destroyed while you have a cannon out then the cannon will still function fine, but you will not be able to place any more until your amount of cannons out is less than the amount of observatories.
The Basics, part 2
The first thing you need to know about the cannon is the different angles to fire at. A cannon has 7 different angles to fire at, and you set your firing angle in the cannons aiming mode. To set your angle you tap the S or W keys while holding shift to aim. Obviously, firing at different angles affects how far the cannon will fire. I can’t tell you what each angle equals in degrees, but I can give you all the practical knowledge you need to make use of it..
The cannon starts off at angle 0, and each time you tap S it will go up by 1 angle; up to a maximum of 6. If you want to, you can hold S to rapidly bring it to angle 6, where you can then tap W to decrease the angle value to reach what you want.
When you have an angle set, you hold left click to fire the cannon. When you start holding left click the charge bar (looks like a stamina bar) will start filling up. A common misconception about cannons is that the charge bar is an analog system; when actually it is not. Even though the charge bar shows values between 1 and 100, there are only 10 power levels within that. Each multiple of 10 is a power level. Meaning charge level 31 will fire at the same exact power level as charge level 39, charge level 73 will fire at the exact same power level as charge level 77, etc. The only number you need to watch is the first digit, because that is the power level your cannon will be firing at.
What this means is that when you try to fire at charge 30, 40, or any charge ending in 0, you are actually shooting yourself in the foot. So if someone tries to tell you to fire at charge 40, you are actually firing very inaccurately. Whenever i’m firing a cannon, I always try to fire at a charge ending in 5, so that I am least likely to release the button too early or too late.
What this also logically means is that there are only 70 possible combinations of angle and power that a cannon can fire at. When I first found this out many months ago, the first thing I did was take my guildie Nose to a flat area, and chart out exactly how far each combination of angle and power fired.
So now I present to you, the holy grail of cannoneers.
The Angle-Power Chart
Make a copy of that and bookmark that copy, because the creation of that sheet way back when made the Luciform cannon crew overnight become the best cannon crew on the server. I have a mini guide on the sheet itself, but i’ll write out here how to read it as well.
The very top is the distance, and the values under each distance number is all the possible combinations of distance and power that would fire that far (on a flat surface). So if a target is 280 meters away from you, then you will have to adjust your cannon to angle 4 (hold shift and tap S 4 times) and then fire at charge 95 (hold left click until the stamina bar reaches 95, then release).
When there are multiple values for the same distance, you should always pick the number on the bottom of the list. Steeper angles are tougher to trace and are less affected by height difference.
What this guide does not account for is any height differences. If you are above or below your target at all then that will obviously affect how far your shot flies. I don’t have too much advice here, as this is one of the areas where you just have to get used to cannoning and have a scout help you adjust your aim when you miss.
The only advice I can give is to try and position your cannon to use angle 6 values, as angle 6 fires at the steepest arc and thus will be least affected by any difference of height.
Aiming the Cannon
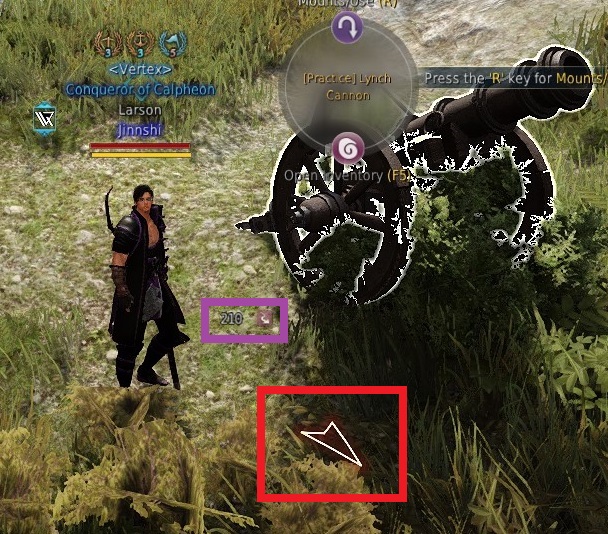
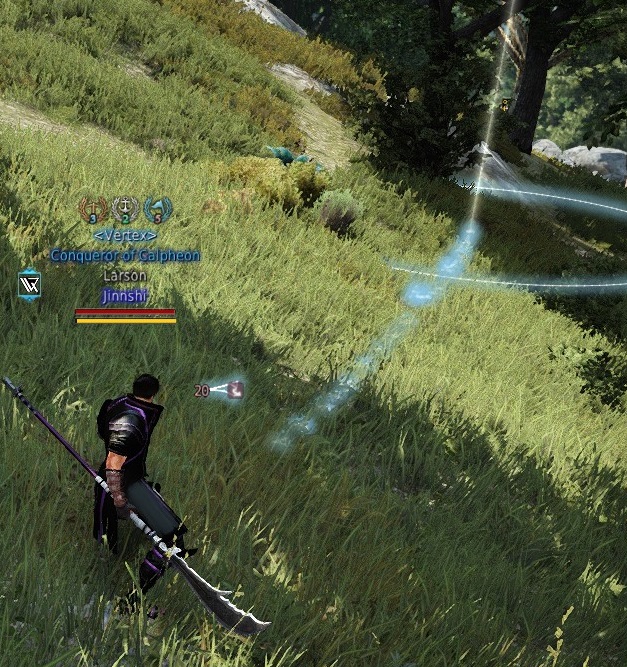
When you are aiming the cannon, it is very important that you have a ping to aim at. Whenever you have a waypoint set, or when a guild member puts a permanent ping on something, you get an arrow near your feet pointing at that target and a little number telling you how far away that target is. You look at that number to know exactly how far away your target is. You can then consult the angle-power chart to see what angle and charge you should be firing your cannon at
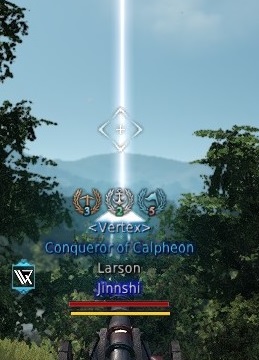
Then you just hold shift, place the center of your reticle over the waypoint/ping, and open fire.
In an actual fight there will be a lot of guild pings all over the place. So when you are set up and about to aim at a ping, press M and ctrl-left click on all the pings to remove them from your map. I do this to clean up the map all the time, and as a cannoneer it’s important that you know which ping you need to be setting your sights on.
You can also have your cannon scout ping the same spot repeatedly so you can just look at the blinking ping and know that that ping is the one you should aim at.
Cannon Scouting
This section is going to focus on what you should be doing to be a good scout.
A scout’s job is to get close to a target, ping it so your cannoneers can see it, and then stay in visual range of the target to confirm if your cannoneers are hitting or not.
You will need to be talking to your cannoneers over voice comms to do this. Teamspeak3 has a whisper list function that works very well. Otherwise you will have to talk alongside everyone else in the battle. I do not recommend moving to your own cannon channel because even though it’s hectic, it’s also important to know what’s going on. Just try and keep any comms short and sweet.
If your cannoneers are well positioned then they will all be separated from each other, and firing at the base from all sorts of directions. So when you are scouting for them you have to learn their voices and have them state what cardinal direction they are firing from so you can watch for shots from there.
This job is very class specific. While anyone can do it, Musa, Maehwa, Ninja, and Kunoichi by far are the best at it. The best thing you can do is get a ping on a target and then lean up against a nearby object to use the observe view so you can see the target best. Unfortunately that is very unrealistic to pull off. Whenever i’m leaning against a tree or rock people start doing everything in their power to hit me and kill me.
So what I do that works well is wait until my cannoneers are in position, then I dash up to my target and spam my tilde key on it until the 5+ defenders kill me. Then I just watch the target with the death camera to see how the cannoneers are doing. When I confirm that they are all hitting, I respawn and get ready to hit another target.
Sometimes I don’t die, when that happens I can dash out then crouch up to visual range of the target to observe shots while safe. Depending on the target I don’t need to enter the enemy base to ping it either; I can just be crouched or prone outside their base from the start and ping it from safety.
During saturday sieges things can get awkward sometimes. With the big walls or castles being there, pinging a target is pretty difficult. But, i’ve figured out two solutions to these problems.
Solution 1 is to aim into the air when you ping. If you aim up and ping the air over something, a ping will appear a short distance away from you in that direction. This is very tough to get used to using right, but if you can use it right then walls will no longer stop you from pinging enemy towers.
Solution 2 is to look and learn the layout of the enemy base, and then press M to open the map and zoom in as far as you can so you can ping on the map where the enemy towers are.
The point of this is, cannon scouting is not an easy role; so it will take a lot of practice until you can figure everything out.
Target Priority
Flame Tower Hwacha
There are only two turrets available in nodes and sieges:Flame Tower and Hwacha. Of these two, the Hwacha is more dangerous; as it’s ranged aoe can decimate any offense push easily. The flame towers can sometimes be avoided as they are short range, but if any flame towers are well placed near other structures or in choke points they can pose big threats and should be taken out.
So your targeting priority should be:
Hwacha > Well Positioned Flame Towers > Poorly Positioned Flame Towers
You will want to destroy all enemy turrets, but if a flame tower is very poorly placed then you can safely ignore it.
Remember that cannonballs have a very large AoE, so you don’t have to hit a target directly on the head to damage it. You can also hit multiple defensive structures at the same time, which is always a real good thing.
Something to be careful of though is invisible Hwachas. I dashed in too fast on the below picture of OTGs base, and you can see the name tag of a Hwacha floating there, as well as a person hunched over operating the turret, but the turret itself is not loaded in. So when you are scouting a base you have to really watch for name tags more than physical structures.
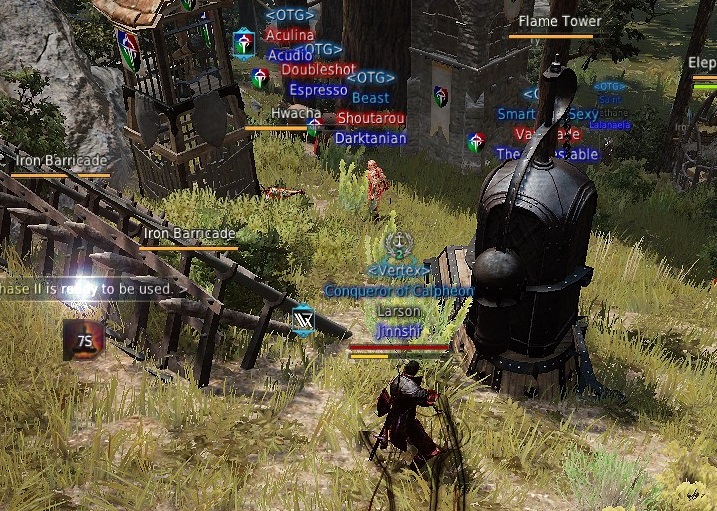
Also notice how the Hwacha and Flame tower are right next to each other, a single cannonball could easily hit both.
Each cannonball does 15% of defensive structures life, so it only takes 7 shots to kill a flame tower or hwacha. This means that you should not have any more than 4 cannoneers on your cannon team, because 4 cannoneers is enough to have a target die in 2 volleys. Vertex does just fine with a 2 man cannon team though so you really don’t need that many people assigned to the job to kill structures efficiently.
It needs to be noted that cannonballs do very very little damage to non-turrets. So they should not be used to damage structures/barricades as it would be better to have the cannoneers get off their cannons and fight on the ground than to fire at the structures.
How to position your cannon.
Now for the hardest part of cannoning. The difference between a good cannoneer and a great cannoneer isn’t their ability to aim well or 1v1 well, but their ability to position their cannon in the best spot to maximise how long they go without being detected. Doing this is extremely tough and sometimes actually impossible, but when you can get to a spot that the enemy can’t reach or find, then you become a god.
Theres three strategies for cannon positioning:
The first is to have people assigned to protecting cannons. I do not recommend this as most awakened weapon black spirit ults can instantly kill a large group of cannons, with nothing the defenders can do about it. Also any people assigned to defending cannons are not fighting on the ground.
This strategy is only good if the cannons can be placed on top of something hard to climb and your guild is part of an alliance or has troops to spare, or in the special case of having your whole guild defend the cannons cause you need the enemy turrets to die really really fast.
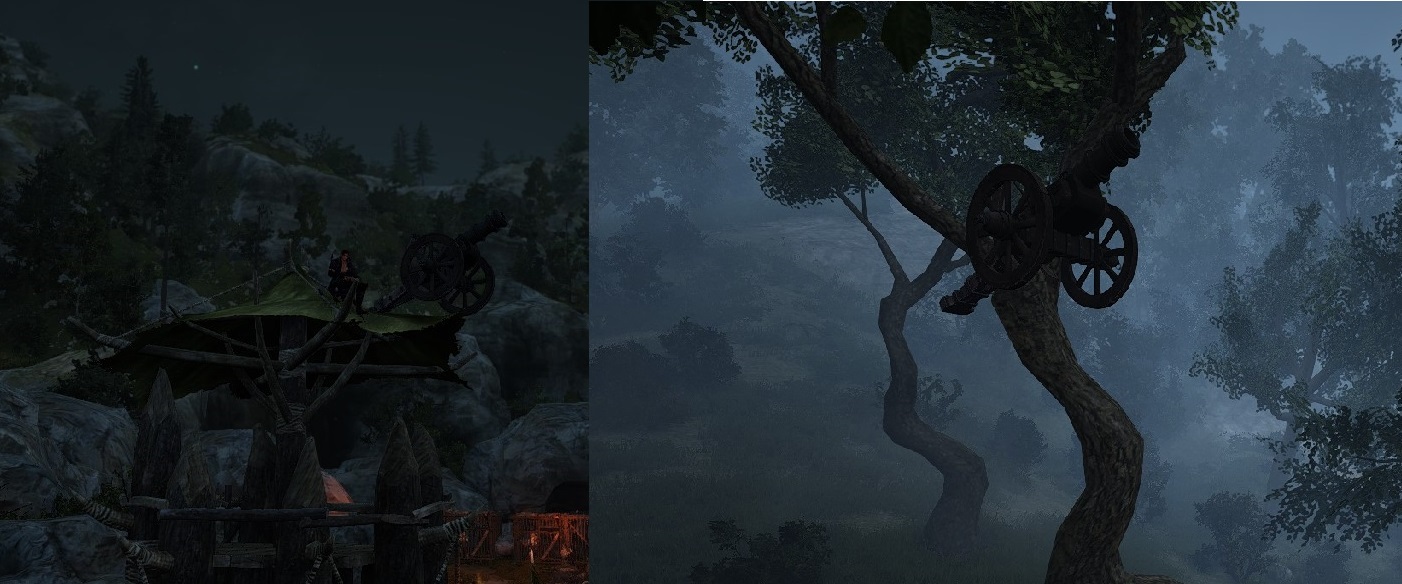
Top of Tower Top of Tree
The second is to just be in very tough to reach places. Ninjas and Kunos are good for this thanks to their ability to climb to weird spots, as well as sorc/tamer/zerker for their unique movement skills. Remember that anything you can stand on as a character, a cannon can be placed on. Just keep in mind that you can collide with cannons, so if you pick a spot too small then the cannon can push you off and you won’t be able to climb back up. If a cannon is ever in an unreachable spot (or just too far away) any guild officer can open their map and left click on the cannon to remotely destroy it.
The third strategy is to avoid detection entirely. This one is the toughest to pull off. The first part of this is to put your cannon very very far away in a bush. Positioning yourself so you can hit defensive structures at angle 3 power 95 would be best, as that is the farthest away you can possibly fire.
If you can fire at a base from 360+ meters then defenders have a very hard time finding it, because they will run off in the direction of the cannon, get to about 250 meters out and figure they went pretty far away from the base, and double back assuming they missed it rather than traveling the extra 70 meters needed to see the cannon. This won’t work for long on anyone, but it will buy some time.
Another way to avoid detection is when you think an enemy scout is coming close(usually after 2 shots) then you get out of the cannon and go prone. If your cannon is hidden in a bush then it will be tough to spot, and you will be tough to spot because your radar white dot will be gone due to you being prone. Then when you see the enemy scout go past, you can wait 20 seconds to get back on the cannon and start firing again.

Crouching Blader, Hidden Cannon
Combine both those strategies with other cannoneers firing from all different directions and you will give your enemy defense crew a very bad time.
This little section is more for whoever is shotcalling when attacking a base, when cannoning an enemy base it’s also a lot more effective to do it while your guild is pressuring it. While it is tough to pressure a base that has turrets still alive, it’s really hard to cannon a base where the defense crew doesn’t have anything keeping them busy. You can fire shots at a base but their defense crew will be able to send everyone out to take out the cannons, which then stops them from firing at the base for a couple minutes. And when no one is firing at the base, the defenders can just rebuild any damaged or destroyed structures.
When the force is not pressuring the enemy base I always tell my cannoneers to get out and prone so they won’t be detected and will be ready to resume fire when the pressure resumes or if I spot any rebuilds.
And that’s all. Only thing to do now is for you to go practice these in some node wars. Cannoning is not easy to do well, but oh so good if it’s done right. If I think of anything to add to the guide, or if any cannon mechanics change, I will be sure to edit the guide accordingly.
Good luck out there!